
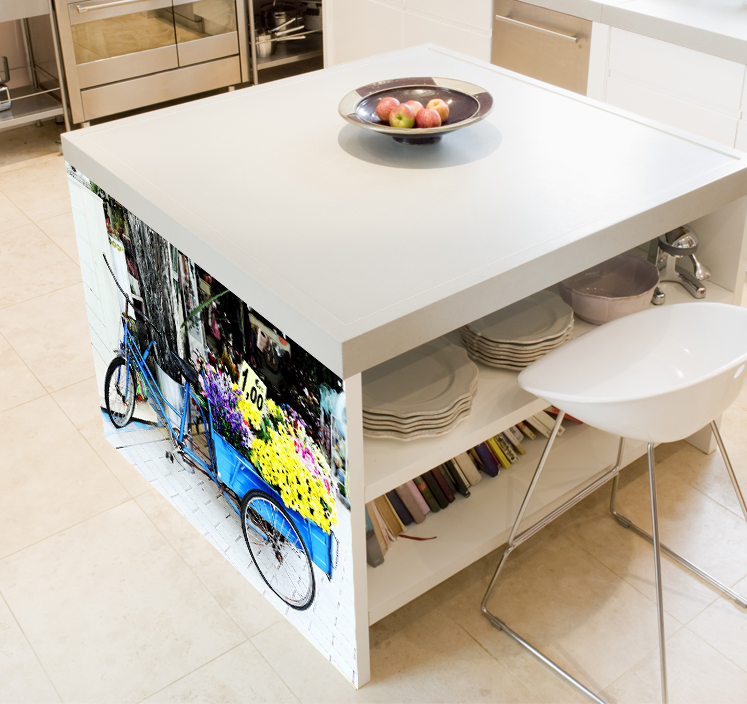
Pasting the facades of the kitchen with a film. How to glue a kitchen cabinet with self-adhesive film
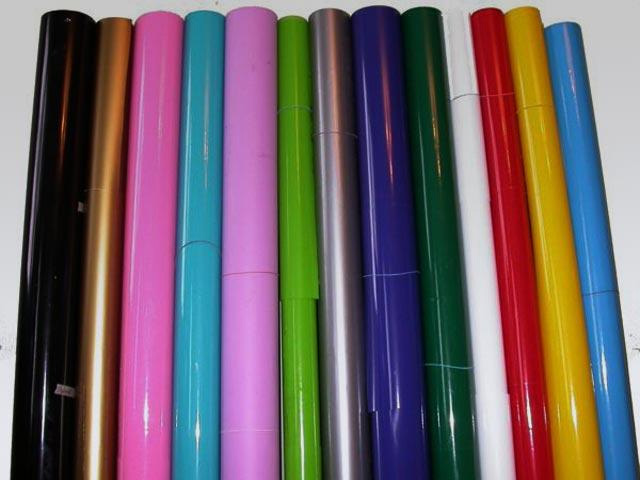
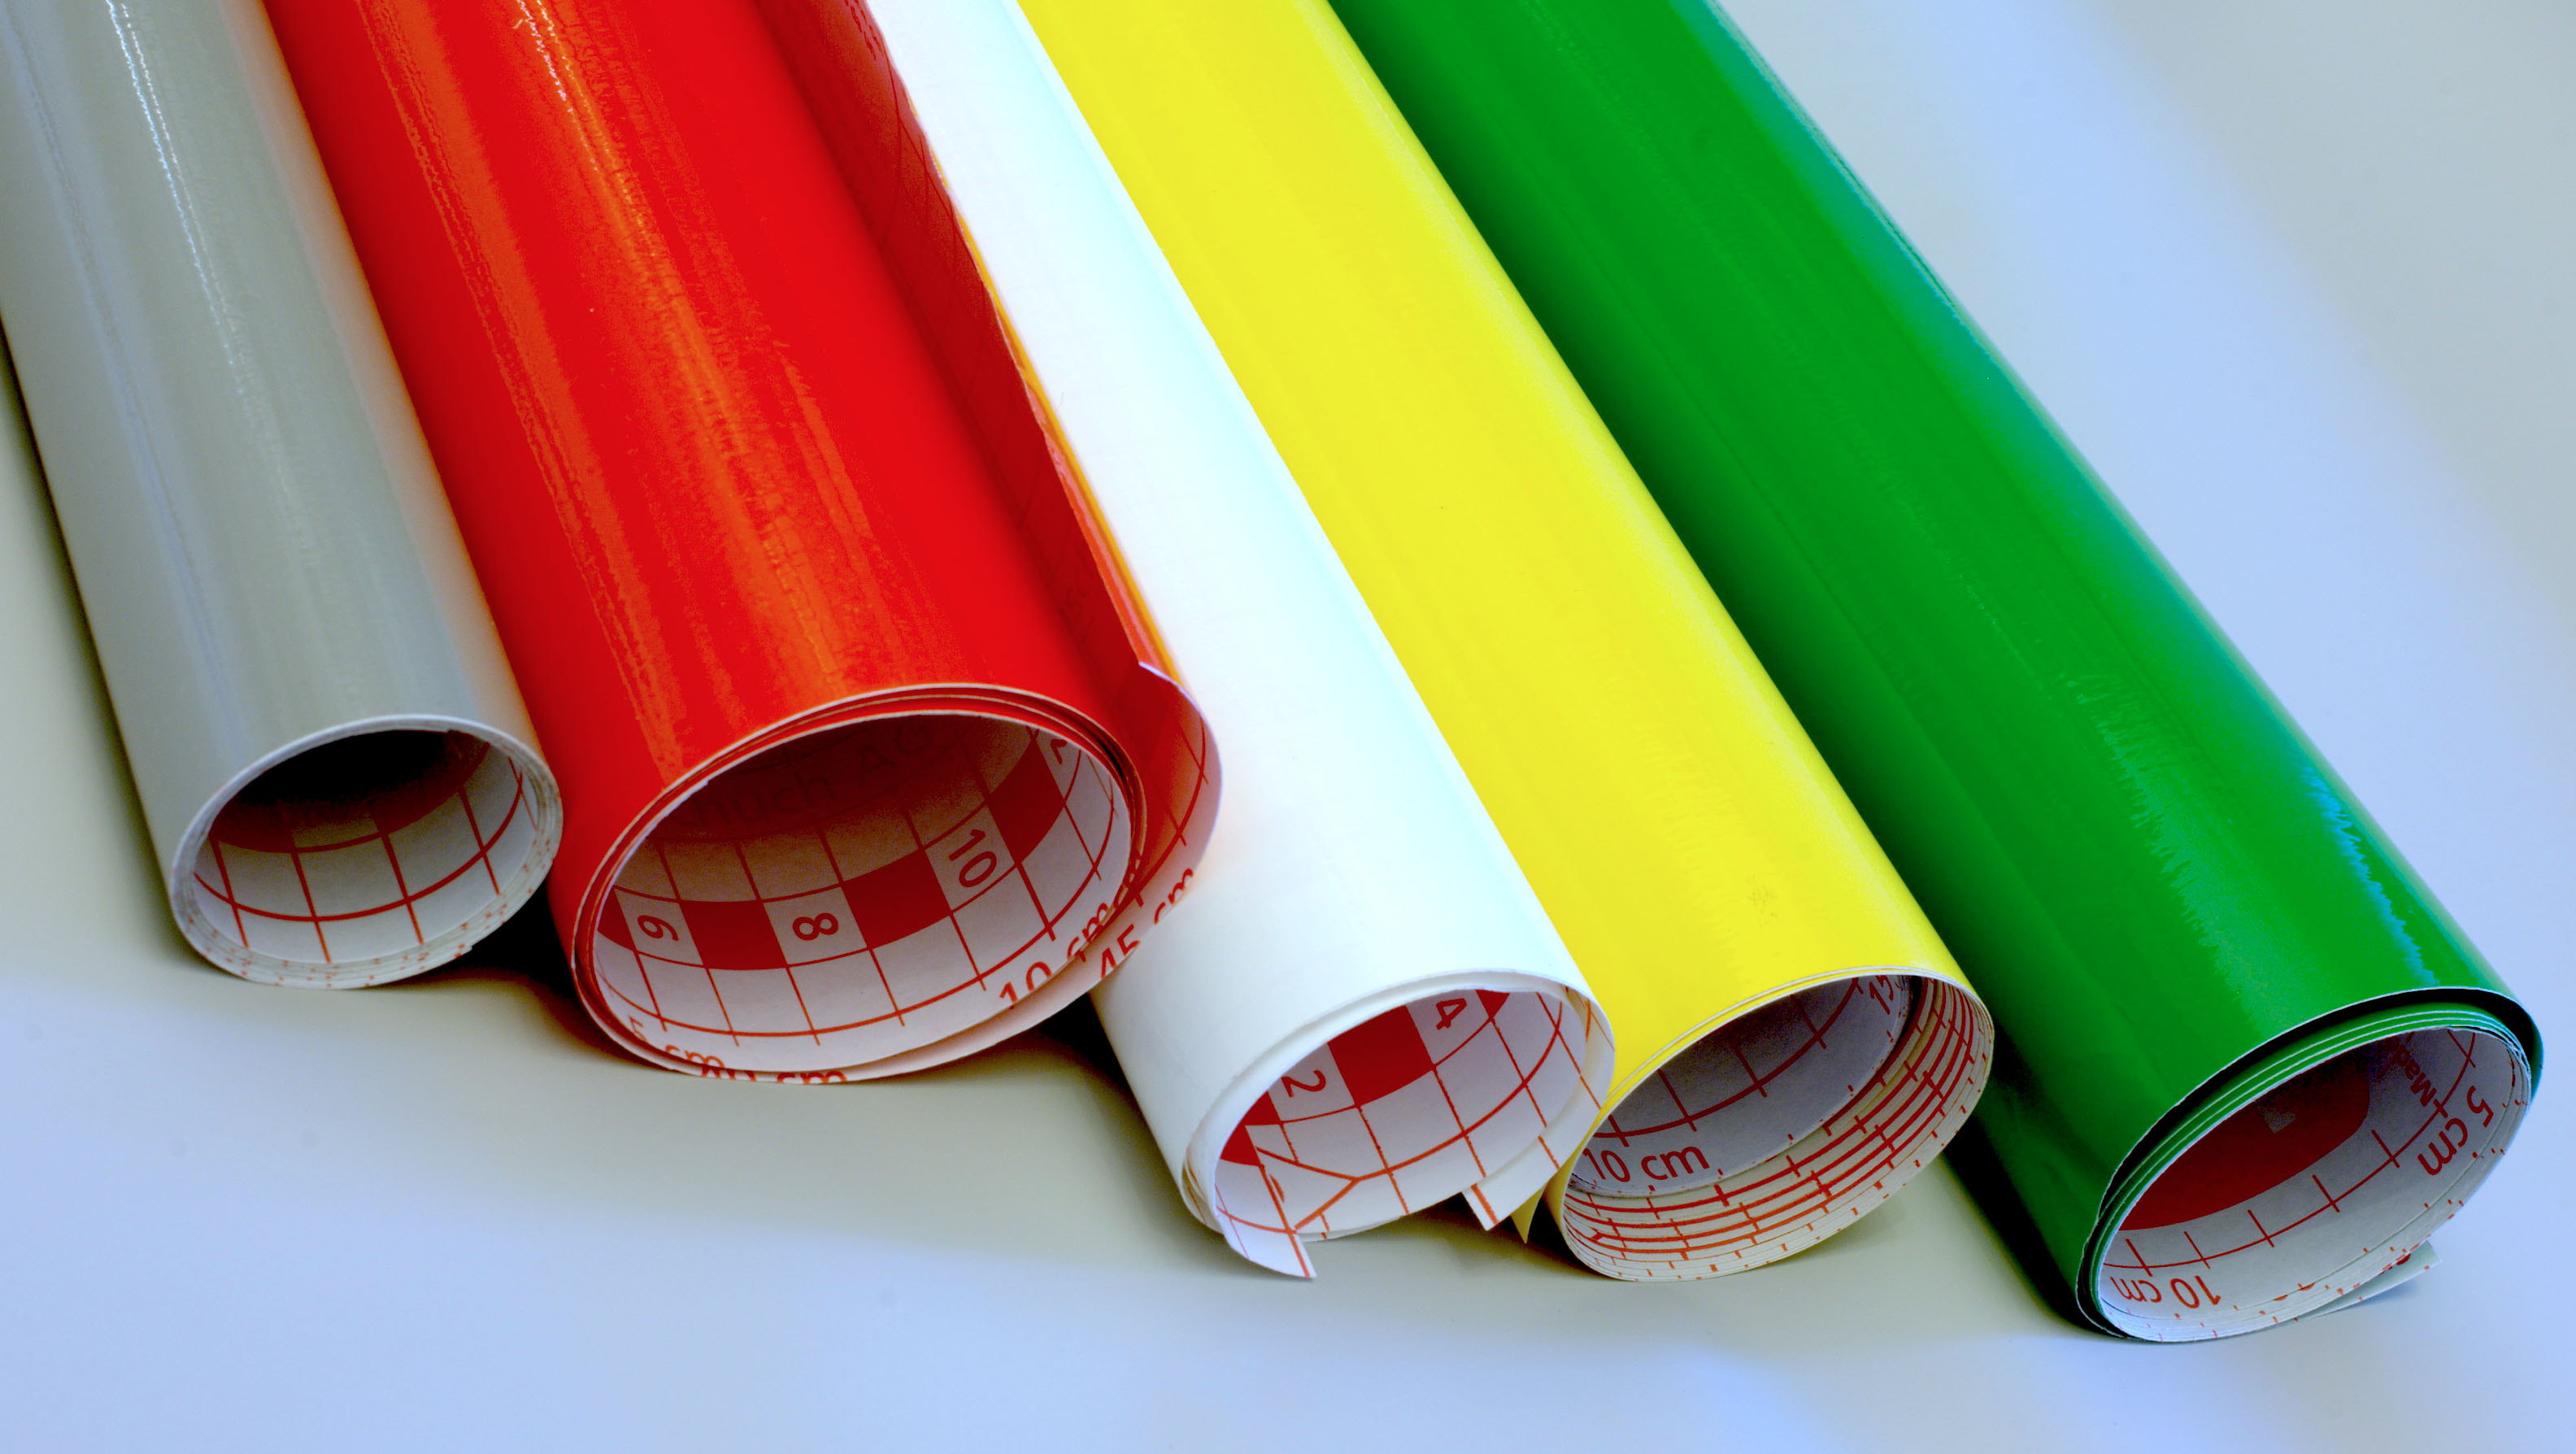
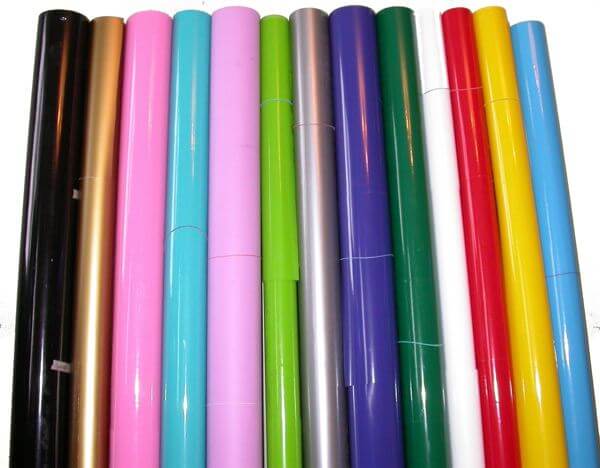
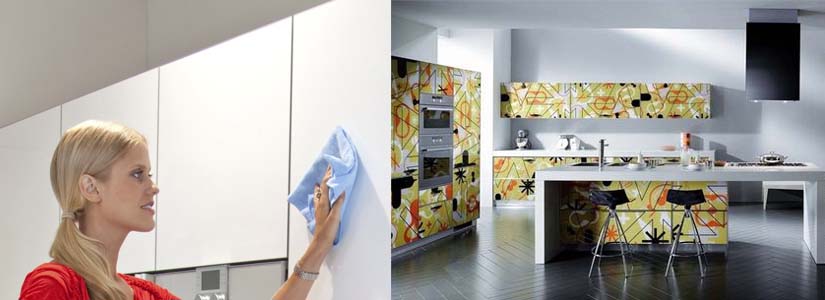
If you decide to make changes in the design of your own apartment, then a self-adhesive film for furniture will be a great solution. Manufacturers provide a choice of about 5 hundred different colors.
thanks to the variety of colors, you can update the furniture in accordance with the overall design of the room
You can completely transform the look of your apartment. A wide range of materials are used for furniture of various premises:
- Film intended for kitchen furniture.
- Film designed for bathroom furniture.
- Film options for use in the hallway.
- Special variations of the film used for bedroom furniture.
- A variety of solutions for furniture located in the living room.
- Bright film for use in the children's room. There are options with pictures and drawings.
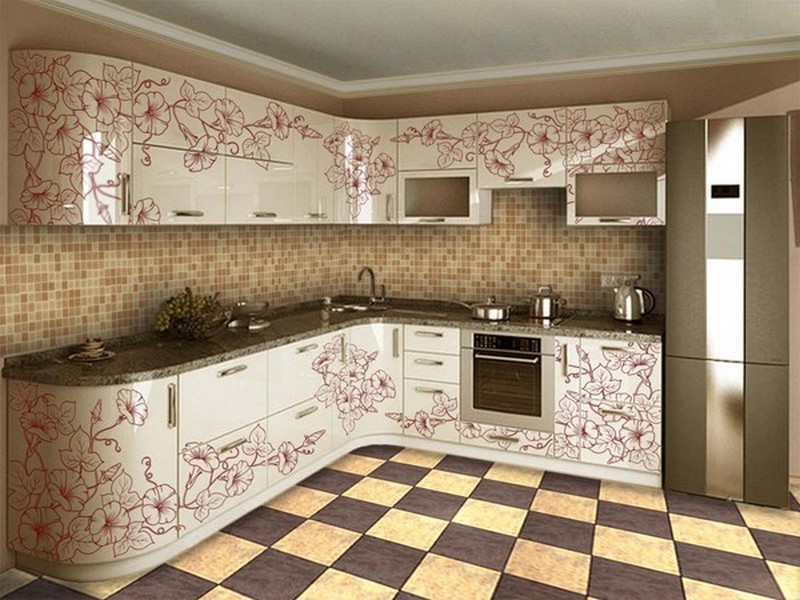
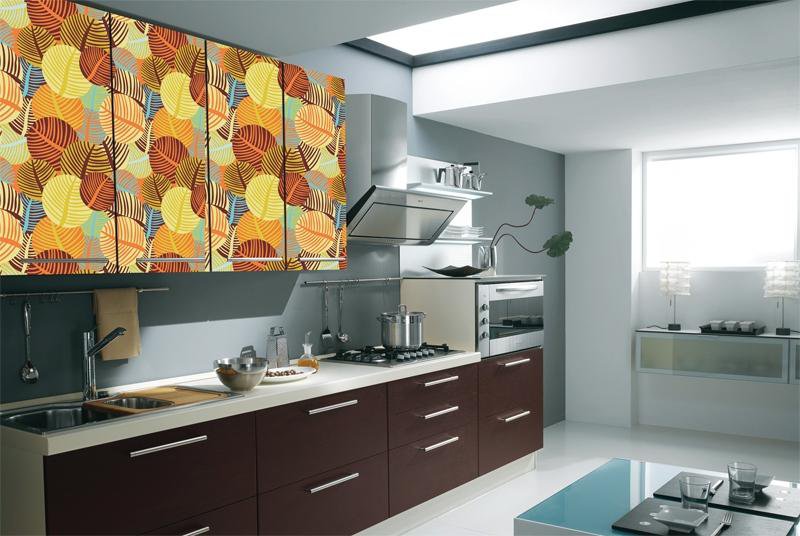
self-adhesive film in the kitchen
The choice of material depends on your imagination, you can create a classic design. This option fits perfectly into the interior of any room, never goes out of fashion.
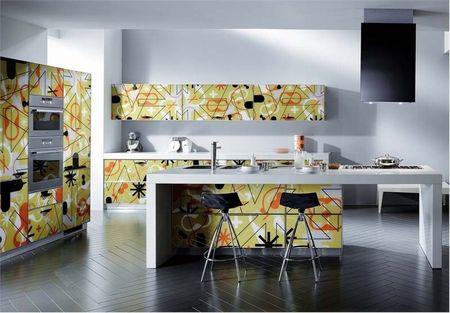
Are you interested in avant-garde solutions? Manufacturers offer a variety of color options for the film, drawing is welcome.
Variety of choice of self-adhesive film for furniture
Depending on the room for which you need a self-adhesive film for furniture, manufacturers provide various options for the popular material. You need to familiarize yourself with the classification of products in order to get the most advantageous solution.
with the help of a film, you can change the color of the facade of the kitchen at least every year
At the moment, there are 4 main types of products:
- Transparent film. This material is designed to protect furniture from scratches and chips. The film has received wide application when covering kitchen furniture.
- Holographic film. Allows you to create a modern and sophisticated design, you will get a shimmering effect, demonstrates the ability to beautifully shimmer with unusual shades.
- Mirror film. Allows you to visually increase the volume of the room. Perfect for use in a small living room or kitchen, looks great in small hallways.
- Film intended for writing or drawing. A great solution for families with children. You will be able to protect the walls and furniture from the creativity of small artists, the painted is very easy to erase.
self-adhesive allows you to save money on buying new furniture
Manufacturers offer a variety of colors. You can create a matte or glossy surface. Especially many opportunities are presented for decorating a child's room. A wide range of colors and patterns are available.
Benefits of using self-adhesive film for furniture
If you decide to radically change the design of your house or apartment, then it makes no sense to buy new furniture. It is enough just to purchase a self-adhesive film that allows you to create unusual solutions.
self-adhesive film is glued quickly and easily
Buyers highlight the following advantages of the material:
- The low cost of the film allows you to make changes to the overall design of the room quite inexpensively.
- Manufacturers offer a wide variety of colors, which allows you to choose the most effective solution.
- The material perfectly protects the furniture from mechanical damage, scratches and chips.
- If the film has deteriorated, lost its attractiveness, then it is quite easy to replace the material with a new one.
- Allows you to quickly and cheaply update old furniture. You can stick the film yourself.

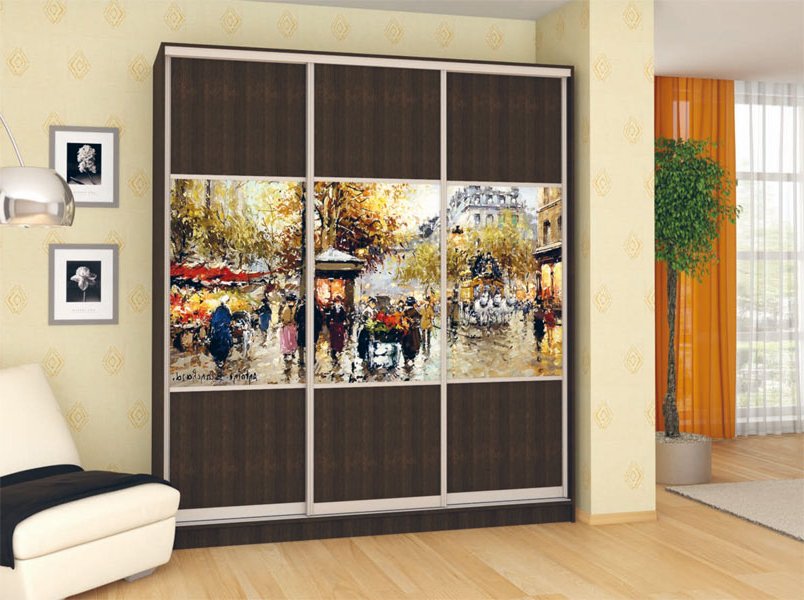
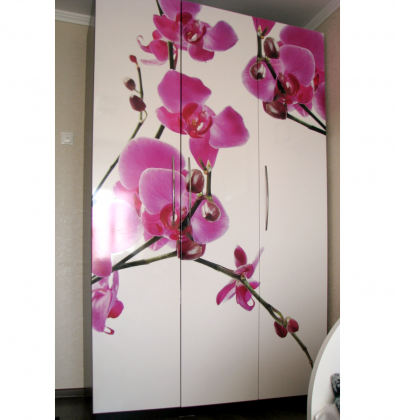
updating the facade of a three-leaf wardrobe with self-adhesive
Modern manufacturers guarantee high quality material. The film has found wide application in the kitchen and bathroom, because it perfectly withstands moisture and high temperatures.
Self-adhesive film for kitchen furniture
In the kitchen there is increased humidity, so the furniture is constantly exposed to certain risks. It is especially difficult for countertops on which housewives cut and butcher food. The use of self-adhesive film for transparent type furniture will be an excellent protection.
self-adhesive film will create a spectacular furniture design
If you are tired of the usual kitchen design, then there is an opportunity to make a difference. You just need to purchase a film of the desired type, which will allow you to inexpensively change the familiar look of the room.
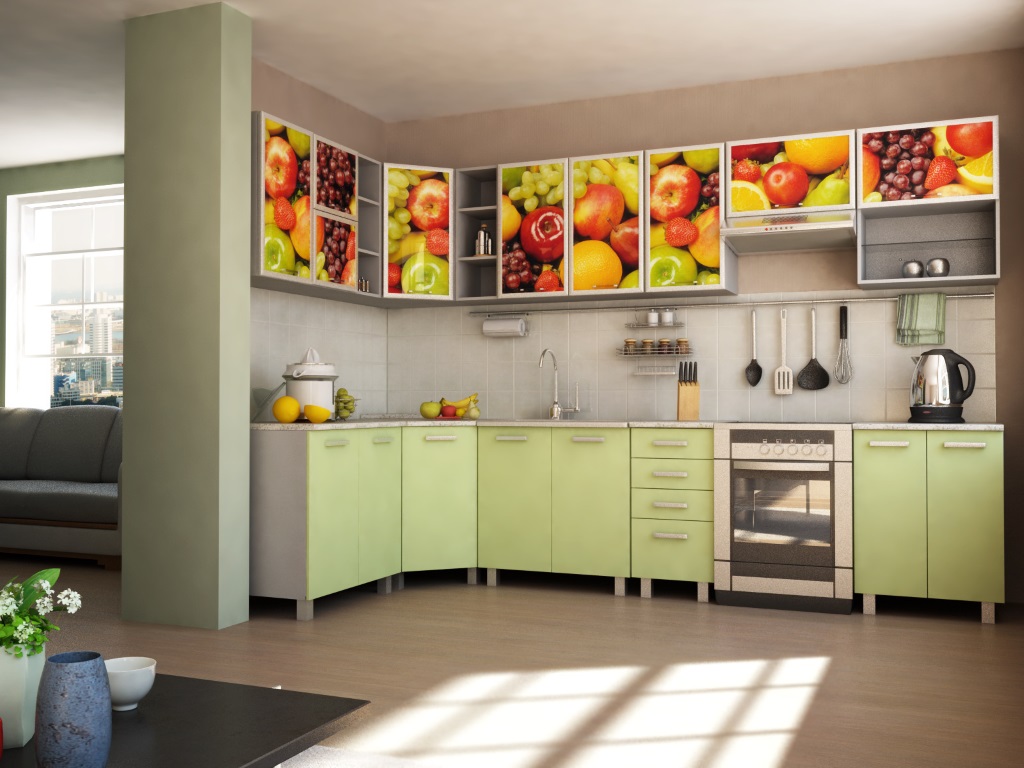
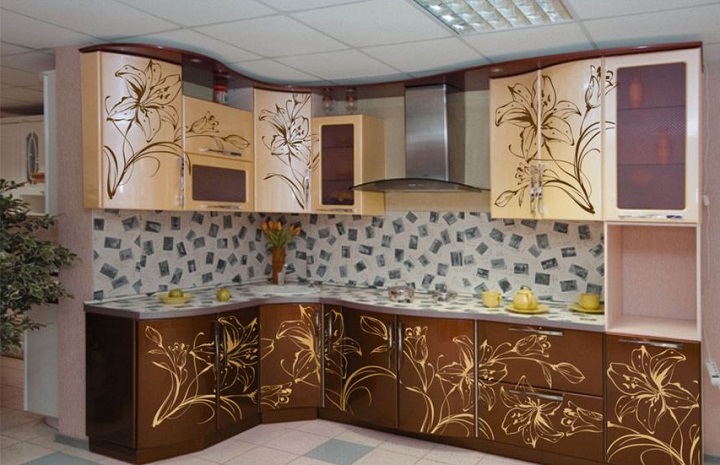
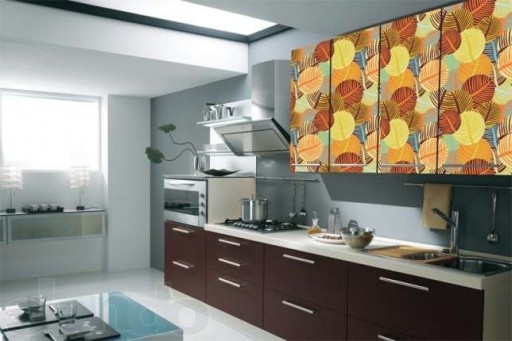
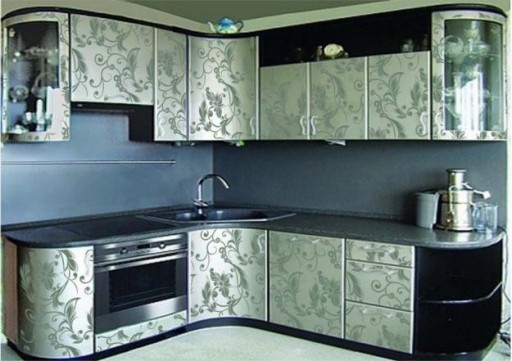
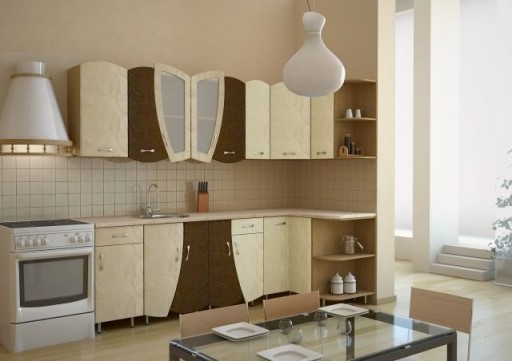
finishing of the upper and lower kitchen cabinets with self-adhesive film
You can choose different color options for the top and bottom cabinets. This combination will create unusual options that are harmoniously combined with each other.
When choosing materials for the kitchen, you should give preference to high-quality film, which is characterized by increased resistance to moisture.
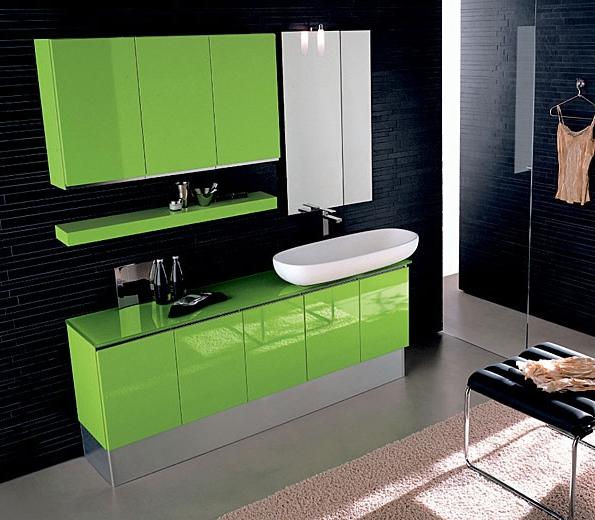
Self-adhesive film for bathroom furniture
decorating cabinets with self-adhesive film in the bathroom
If you have a large bathroom, then, for sure, there are various cabinets and bedside tables. Do you want to create a unique style? A fairly economical solution would be pasting furniture with a film.
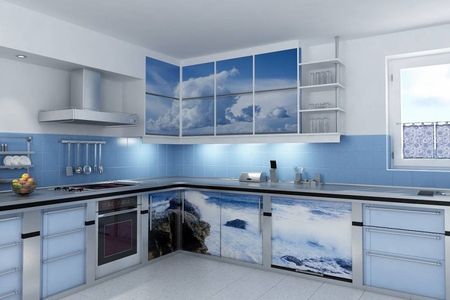
Want to provide a mysterious marine mood? Self-adhesive film for furniture in blue color will allow you to visually plunge into the open spaces of the sea, mentally set off on a unique journey through the waves.
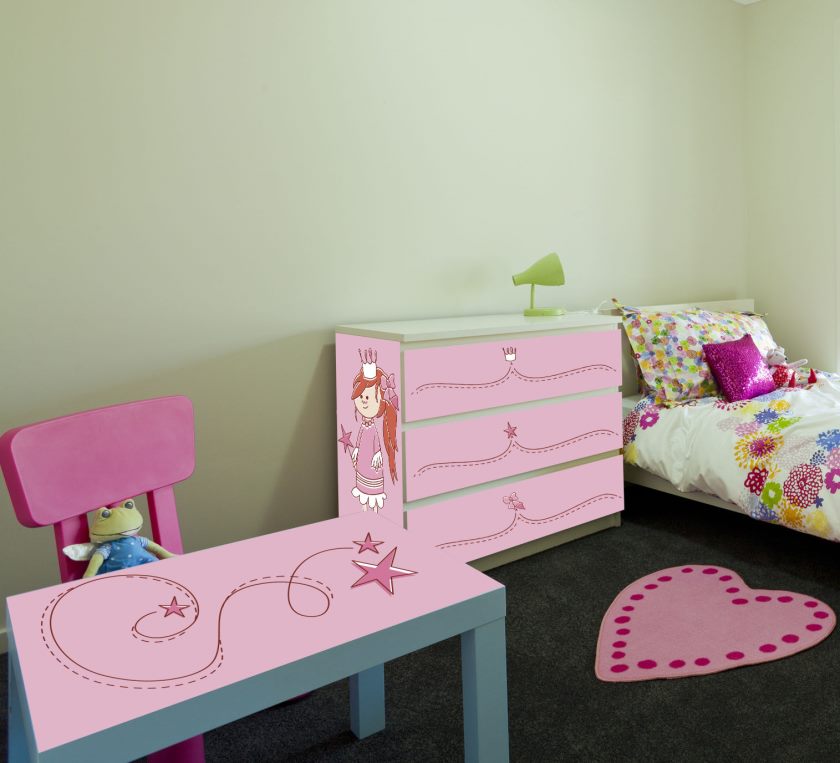
Self-adhesive film for furniture in the children's room
decorating a children's room
With the birth of a baby in every home, there is a need to equip a children's room. Naturally, the room should be bright and safe. The interests of the baby are constantly changing, so the self-adhesive film for furniture allows you to change the interior every year.
Is your child a fan of cartoons? Manufacturers offer to purchase material with the baby's favorite characters. Are you into fairy tales? Please, fairy tale characters are presented at your choice.

if you want to bring a little fairy tale into the interior of the nursery - paste over the furniture with a film with characters from the baby's favorite cartoons
Does your child like to draw? It makes sense to purchase a film designed for writing or drawing. Such a decision will allow the child to show creativity in a specially designated place.
Is it time to get ready for school? The furniture will easily turn into a more serious one, the film will allow you to surround the baby with letters and numbers, various geometric shapes.
The versatility of self-adhesive furniture film

thanks to the film, you can give the interior a marine style
This material is inexpensive and versatile. You can quickly transform the look of any room. Manufacturers offer huge selection films intended both for private use and for entrepreneurs.
The following possibilities of self-adhesive film for furniture stand out:
At present, it is possible to completely renew furniture, an inexpensive film allows you to get a great solution for little money. You can significantly save on the purchase of new furniture.

a bright furniture facade created with a self-adhesive film will dilute the monochrome kitchen design
How to stick the film correctly?
Have you purchased a self-adhesive film for furniture? How to use the material correctly in order to get the desired solution? Before starting work, you should carefully read the recommendations of specialists:
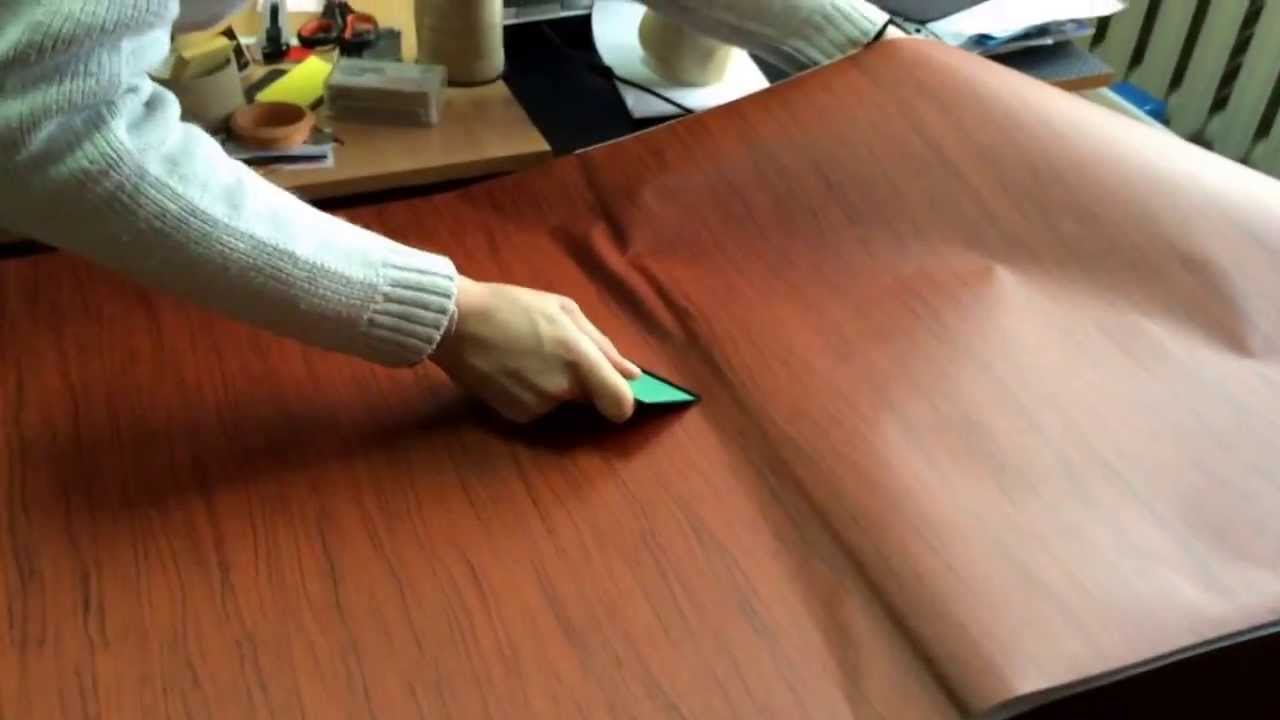
Surface treatment should be done slowly and carefully. The correct sequence of actions will allow you to achieve the most attractive solution. You will receive a quality furniture upgrade.
Sticking the film on specific surfaces
If you need to process a large surface, it is recommended to additionally use wallpaper glue. Bonding and adjusting the material is only possible when the adhesive is wet.
the film allows you to get an unusual door design
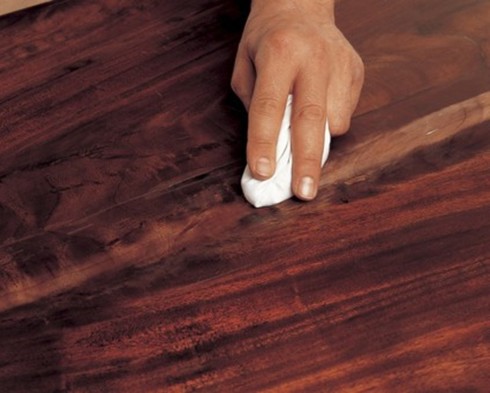
If bubbles appear during operation, then experts advise piercing the material with a needle. Do not be afraid that you get an ugly puncture. You will release the resulting air, and the product will retain a wonderful look.
Special attention is required when sticking the film on a glass or metal type surface.. It is recommended to pre-wet the furniture with a soapy solution. You need to remove the paper base, and attach the self-adhesive film to the moistened surface. Next, you need to smooth the material, which can be done with a sponge or rag, your movements should be directed downwards.

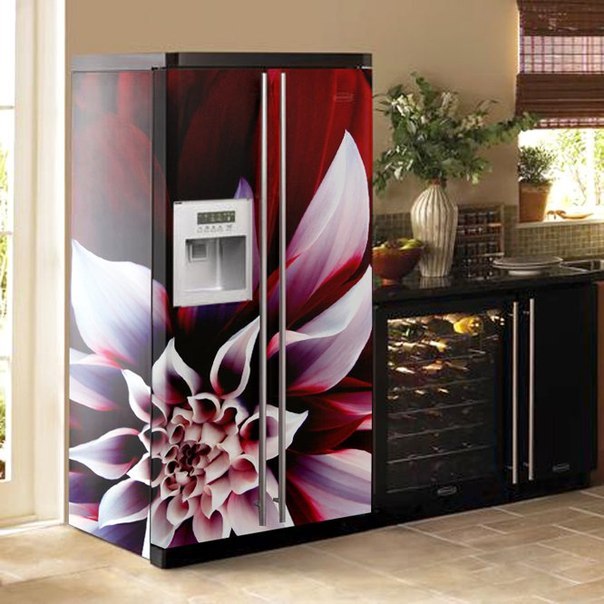
an example of decorating with a refrigerator film in the kitchen
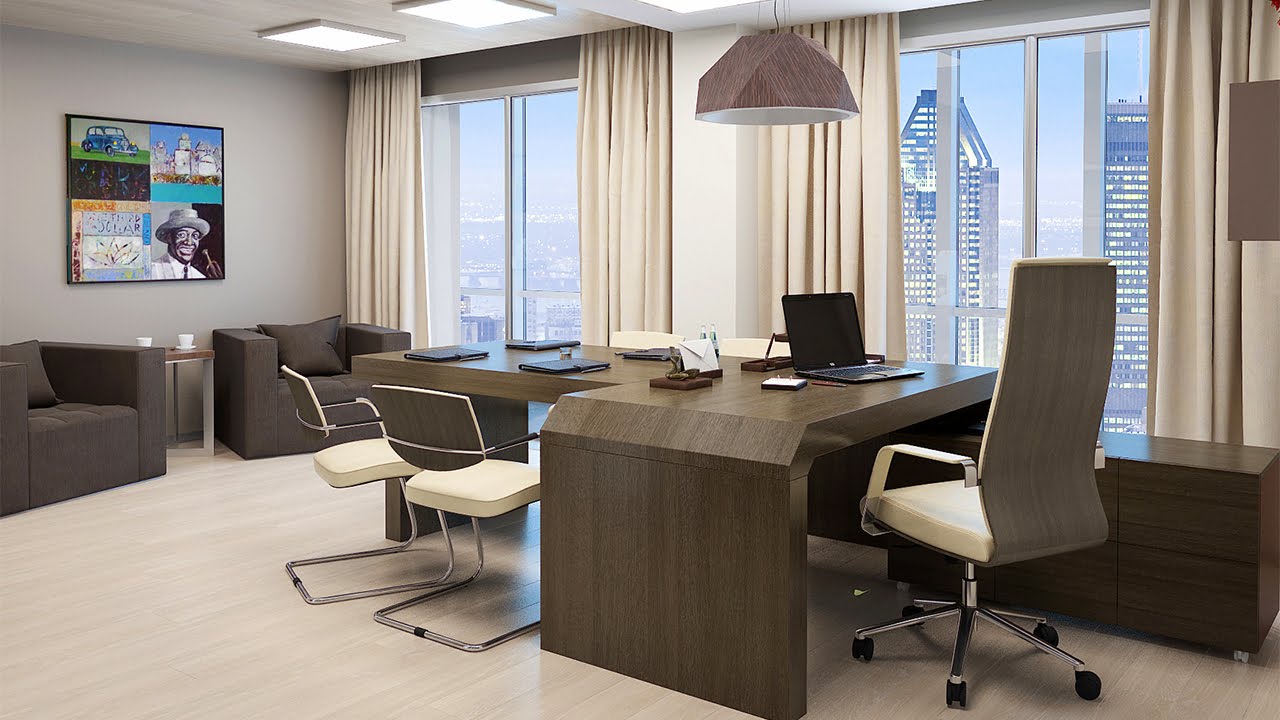
Office decoration with self-adhesive furniture film
Every businessman wants to make his office look presentable. Many entrepreneurs spend a lot of money on purchasing new furniture made from natural materials.
How to inexpensively transform a room. Naturally, visitors initially enter the reception area. You can use self-adhesive wood effect film to give the doors a natural look.

film with imitation of boards as the main accent
The reception and tables can also be pasted over with a classic color film, which will allow you to get a harmonious solution. Your attention is offered materials of various colors.
In offices, pasting tables and cabinets with self-adhesive film for furniture looks quite nice. You will not only protect the work surface from chips and scratches, but also significantly update the design of the room.
decorating the table in the office with a gray film
Thus, the film will allow you to inexpensively create a unique design, update the interior of an old room. Additionally, window sills and doors can be pasted over to get a finished look.
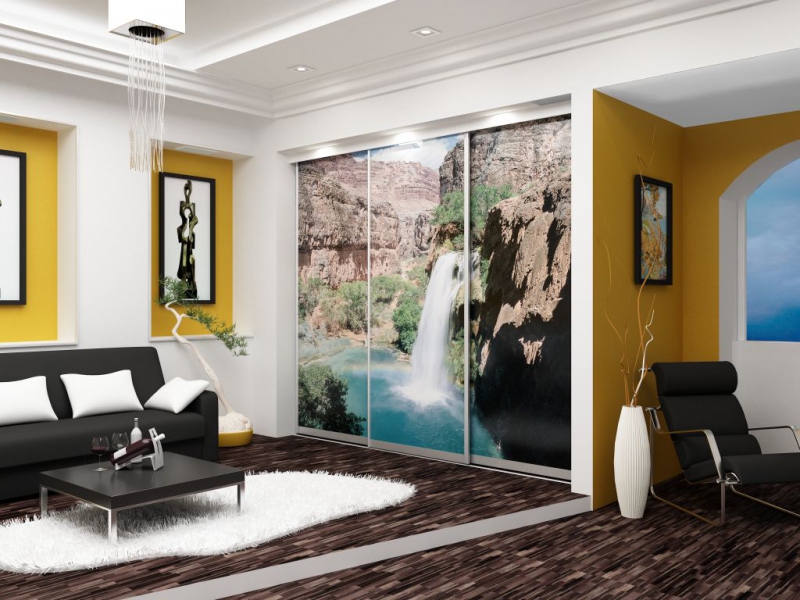
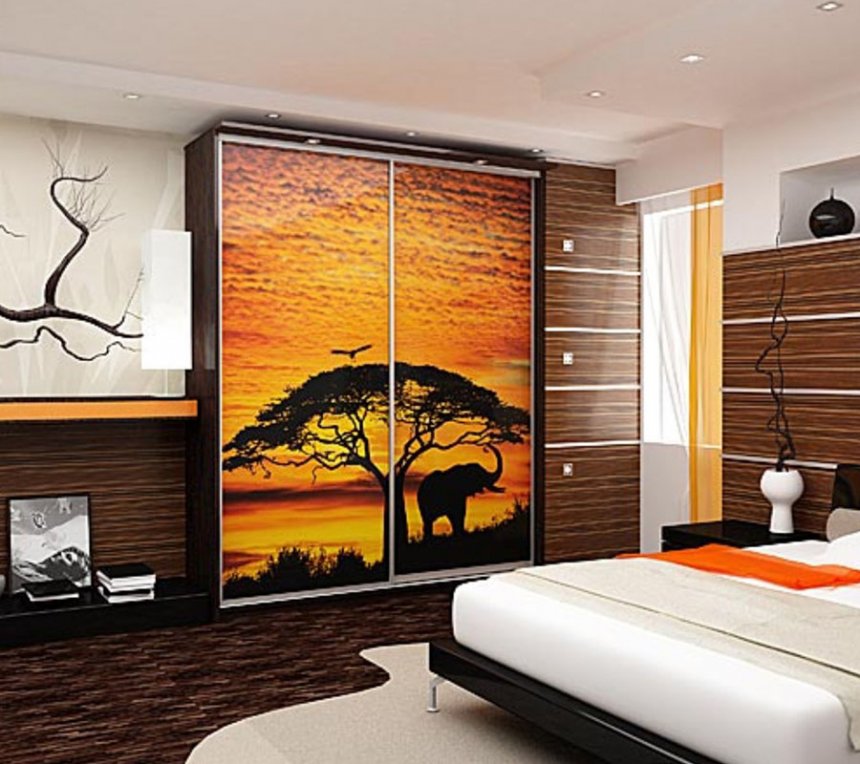
Creating a unique design for your own home
If you decide to radically change the design of the premises, then it makes sense to use a self-adhesive film for furniture. You can contact a specialist who will draw up an individual project just for you.

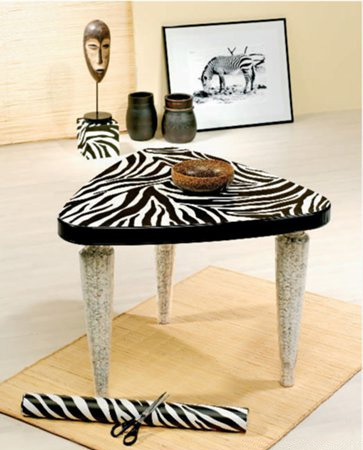
in order to create an African interior, it is enough to decorate the closet with film and change the carpet
When the description of each object is received, it is possible to start a choice of a film. As a rule, designers leave recommendations regarding the color palette of furniture. You just need to pick up the materials of the appropriate type.
It should be borne in mind that for each type of room there is a recommended material thickness. Especially durable film should be bought for the kitchen, bathroom, hallway or loggia.
In the children's room, you need to give preference to brighter film options, you can pick up your favorite images of the baby.
an option to decorate the upper and lower cabinets with a film that differs in color
Self-adhesive film for furniture has a low cost, so it allows you to quite cheaply transform the look of your home. You can save on buying new furniture, replacing doors.
How to buy film?
At the moment, there are a lot of opportunities that allow you to purchase the material you need. You can go to a specialized store where self-adhesive furniture film is available in a wide range.
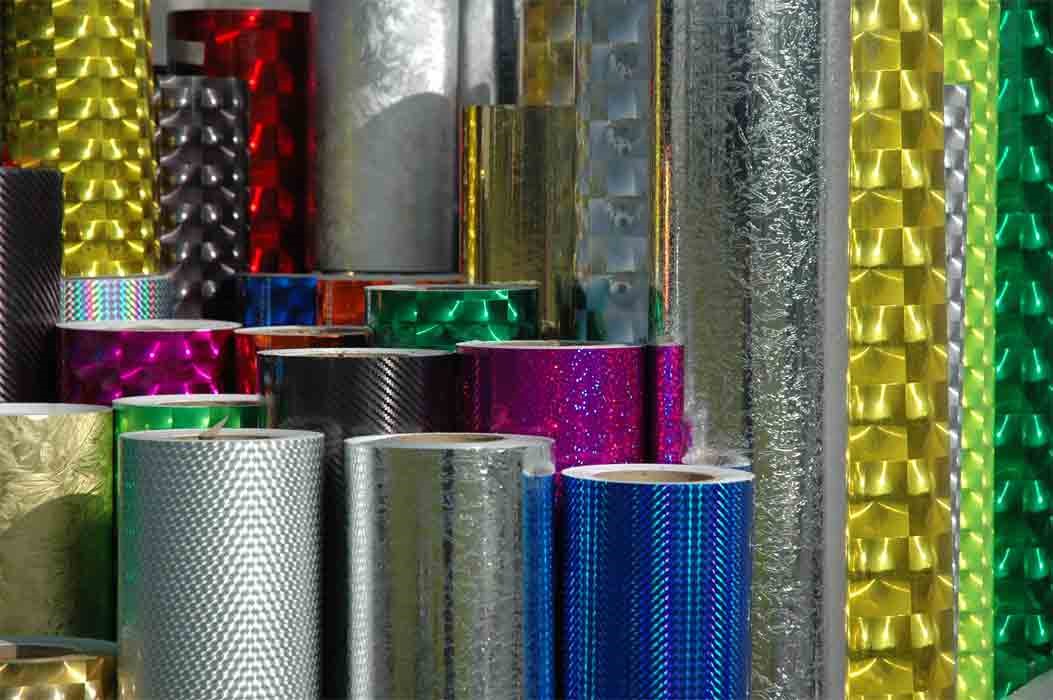
holographic film will give the furniture a shimmering effect
A large number of buyers prefer online shopping. This solution provides the following benefits:
in online stores you can order a film of any color and type
- On the Internet, as a rule, a more favorable cost of material, which saves money.
- You can order the delivery of the material, which eliminates the need to come to the warehouse.
In order for self-adhesive furniture film to give you the most attractive solution, you need to take the right measurements. Before you start gluing the material, you should carefully study the technology of work.
Photo gallery - self-adhesive film for furniture:


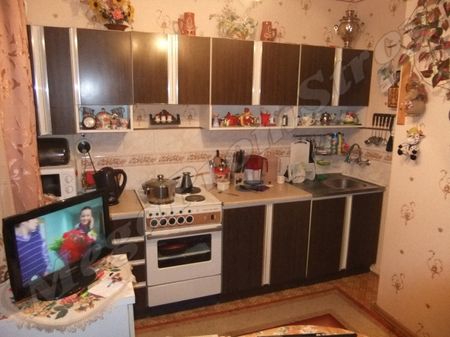
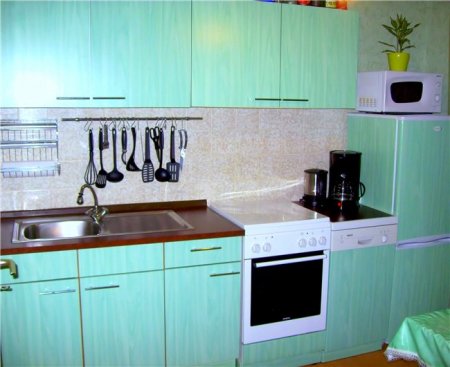
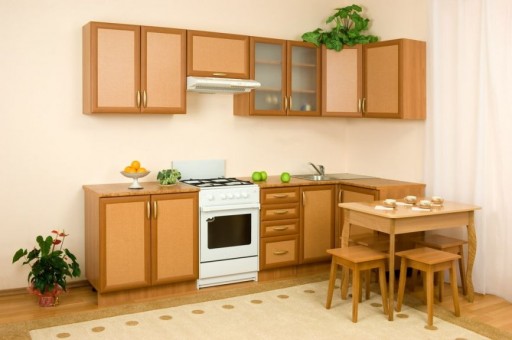
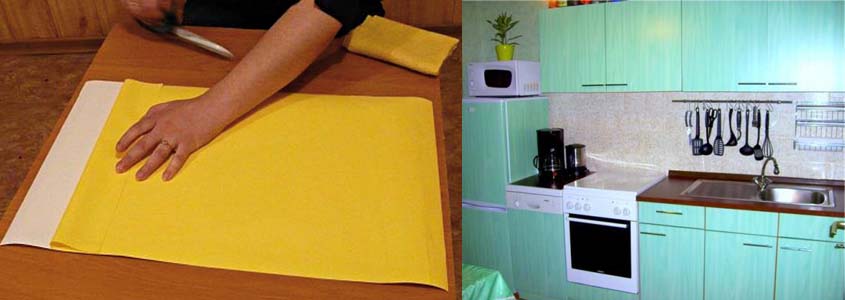
As you know, a person cannot live long without food. And so the kitchen is one of the most indispensable places in the apartment. This is a fairly versatile space in which you not only have to cook food, but also eat, drink, talk, and so on. The kitchen is more than just one of the rooms in the house. This is a kind of symbol of the hearth. Here, as a rule, the main family energy is concentrated. And so we go to the kitchen several times a day. As a result, the kitchen set becomes more and more boring for us every year. Although a year or two ago he could have been the best on earth. What to do? How to get rid of this feeling? Of course, to update the kitchen set. This is the simplest, but the most the right decision. And therefore, we will figure out how to do everything most effectively and relatively inexpensively.
Self-adhesive film
One of the most affordable materials is just a self-adhesive film. Thanks to this, and also to the fact that there is big choice colors and patterns, it has become very popular, especially for the restoration of coatings. The film allows not only to hide the old surface, but also to give it a special look. She can imitate leather, tile, stone or wood - whatever the owner wants. A few meters of such material are enough to turn the kitchen into a new space.
Training
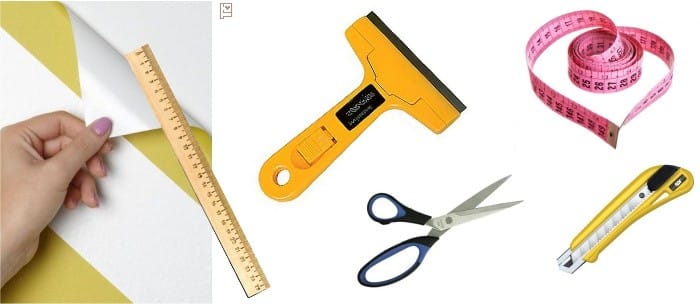
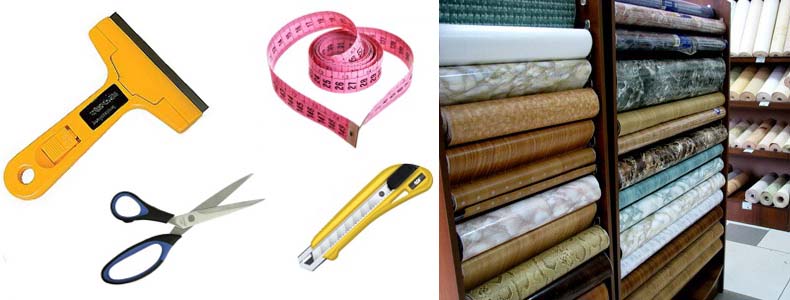
Of course, you first need to prepare the material itself and tools. By the way, it is better to choose a film of a higher class, since this will not only improve the impression of the result, but will also become a more durable solution. Therefore, you need to make accurate measurements and purchase the required amount of this material with a margin.
In addition to the film itself, we still need a solvent, a sharp knife, a pencil, a centimeter, and a cloth to smooth the material.
When all the tools are prepared, you can proceed to the preparation of the kitchen set. To do this, you need to mark the facades (this will allow you to accurately install everything in place), and then remove them.
We lay the doors on a horizontal surface, remove the fittings. If you wish, you can also change it. This will make it possible to further update the furniture. Otherwise, install it in place.
Then you can proceed to the preparation of the film. It's not worth rushing. Everything should be measured several times, and only then cut off. This material does not allow you to rush.
Due to the presence of a special cage on the back of the material, it will be very easy to navigate for cutting. Therefore, we cut the necessary pieces. How to do this, you can see the video.
Sticking
The film is placed upside down. Peel off the backing paper that protects the adhesive layer. This must be done in part. Then we glue the free part of the film to the facade, gently and evenly smooth it with a cloth so that there are no bubbles, and the material itself lies flat. Then gradually remove the protective paper and completely glue the material. If small bubbles appear, they can be removed using a needle.

If something went wrong, don't worry. You should immediately peel off this piece. If he has already grabbed, you will have to remove the glue from the facade and glue another one. In most cases, it is possible to fix everything without spending additional material.
If a monochromatic color scheme is selected, it can be diluted with inserts from a film of a different color. It is only important to choose the right combination.
It remains only to fasten the fittings and install the doors.
Such a decision is a choice in favor of originality, durability, beauty and ease of care.
Wall mural
simple and effective method update the facades of the kitchen set - use photo wallpaper. They, in fact, perform the same function as self-adhesive film.
The only caveat is that the wallpaper is less durable. However, they allow you to place a special image on the doors.

Updating your headset in this way will require careful preparation, just like with film. The only thing is that gluing is carried out with the help of glue, as when working with ordinary wallpaper. After applying the composition, the photo wallpaper must be immediately applied to the surface.
Using this material, you can create an original pattern on the facades of the headset. At the same time, photos can be very different: from flowers to black and white shots of cities. It all depends on the chosen style and design of the entire kitchen space.
The set is an important part of the kitchen
If you decide to update the kitchen furniture, you can do it in one of the following ways. By the way, you can also apply a photo of some objects on a self-adhesive film. For this, a special seal is used.
But it is important that the set looks harmonious in combination with the rest of the elements and the finish of the kitchen. Then the task will be completed at a high level.
In order to hide scratches and defects obtained during the operation of furniture or to renew the surfaces of facades and panels, a special film is used. It is durable, attractive appearance and rich color palette. To figure out how to glue a self-adhesive film on furniture, you need to consider in detail its features and methods of application.
Material characteristics
The film for furniture helps to externally refresh furniture boards that have already become boring over time in a short time. With the help of simple manipulations, the procedure can really be done with your own hands in a few hours. To do this, you only need the material itself and sharp scissors or a construction knife.
Today, the range of this raw material occupies a leading position among other methods of furniture restoration. With the help of the material, you can bring any design decisions to life, while not spending a lot of money.
The popularity of the use of self-adhesive is due to its such advantages:
- the material is supplied in rolls, making it easy to cut rectangles and squares of the required dimensions;
- the film helps protect furniture from future scratches, chips, and if they do appear, replacing the material is not difficult;
- self-adhesive film will help save the family budget: you don’t have to buy a new headset if you can upgrade old products;
- no additional tools are required for work;
- well suited for kitchen furniture, protecting it from grease, dirt deposits and other damage;
- the material is easy to clean, self-adhesive compounds can be treated with detergents, gels.

The raw material consists of several layers: front, adhesive, protective. Each of them performs its function. The very first layer - the front one is made of different material options:
- polymer film - represented by a self-adhesive type of vinyl, which perfectly veneers surfaces. She looks very beautiful on furniture, and her decorative abilities are invaluable. In addition to vinyl, PVC or polyester is used;
- foil - used for facing less exploited pieces of furniture, most suitable for wall cabinets;
- paper - paper-based material can be glued to the ends of the shelves, since such a film does not withstand constant mechanical stress.
Decorative film can imitate a large number of surfaces: leather, wood, natural stone, ceramics, tiles and fabrics. Thanks to this, it has a wide range of applications not only in the renovation of facades, but also in the usual decor.
Depending on the material of manufacture, self-adhesive film is divided into:
- single-layer roll products - made on the basis of polymers, additives in the form of plasticizers, which give strength to the raw material: all components are mixed together and flat rolls are formed by extrusion;
- two-layer models - in this case, two canvases are used in the manufacture: the base and the surface, such a material according to technical specifications worse than a single-layer analogue.
Anyone can glue furniture on their own, this does not require special skills. Before starting work, choose the surface structure of the film, it can be glossy, matte, transparent, mirror and holographic. Each type is used in individual cases, so it is important to determine in advance the purpose of the raw material.


The choice of film, taking into account the type of room
In order for furniture pasting with self-adhesive film to be successful, and to serve for many years in the future, it is necessary not only to acquire high-quality material, but also take into account the type of room in which the surface will be used. Raw materials for the kitchen and bedroom have their own characteristics, so when choosing, use these tips:
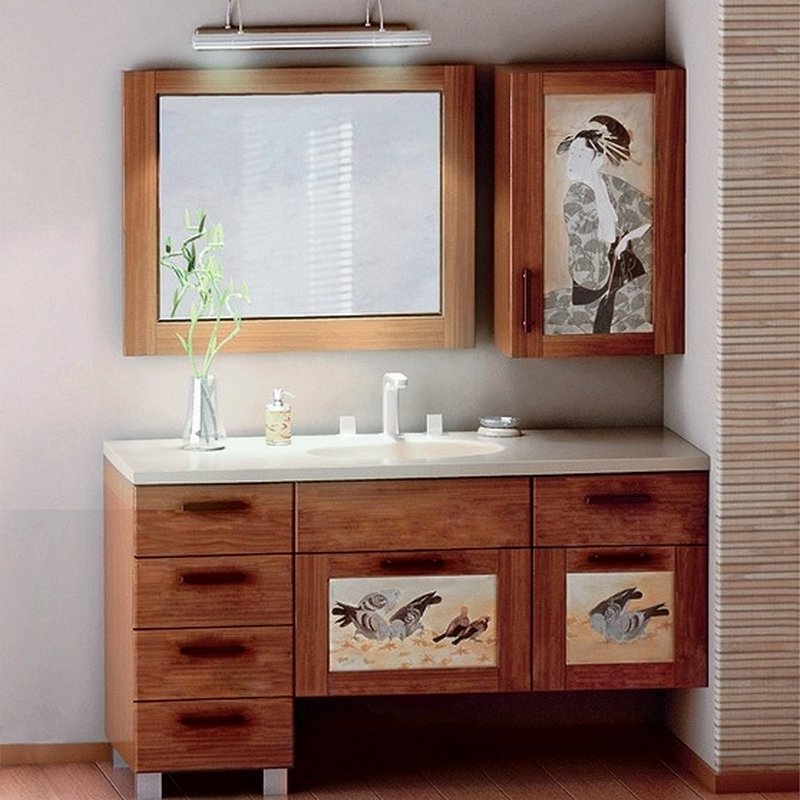
- A film for furniture intended for a bedroom or living room should not only have an attractive appearance, but also fit into the interior. If earlier the facades of cabinets and tables had a certain color, it is not at all necessary to repeat it - you can purchase roll products of a different shade, but do not forget about compatibility with upholstered furniture and decoration. In well-lit rooms, a matte film is ideal - its structure will be perfectly visible when sunlight. When choosing a self-adhesive base for the bedroom, pay attention to products that imitate natural materials. Such options would be appropriate for decorating the facades of cabinets and chests of drawers;
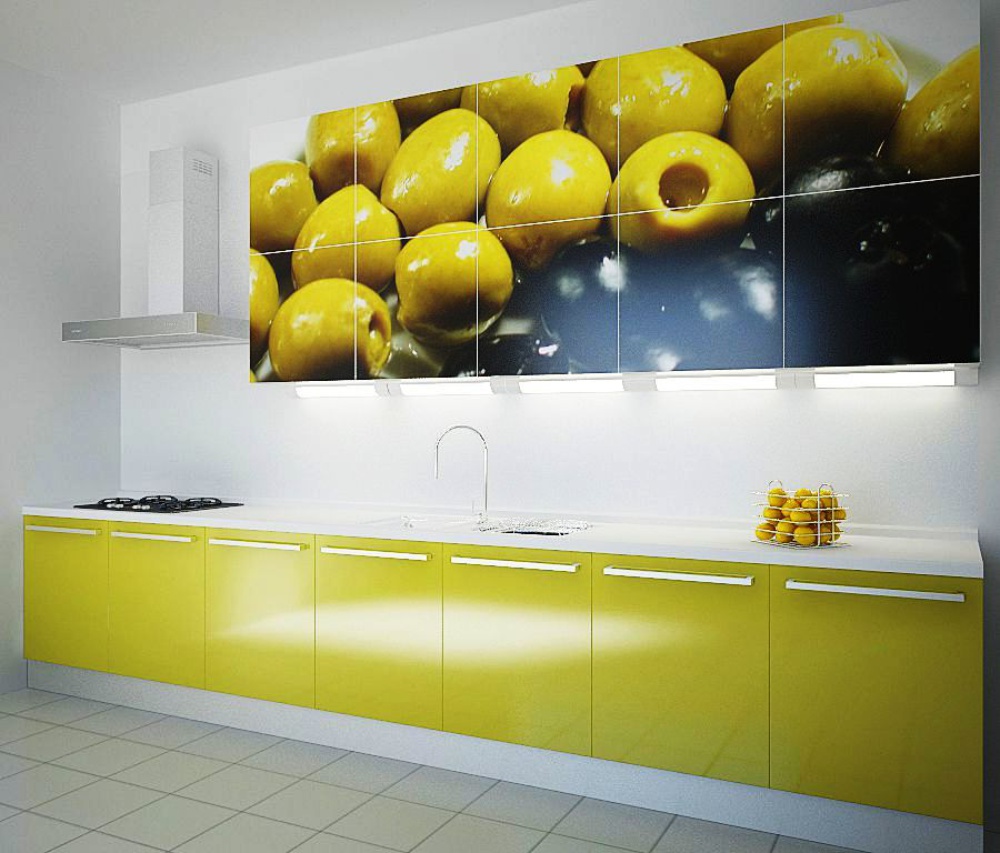
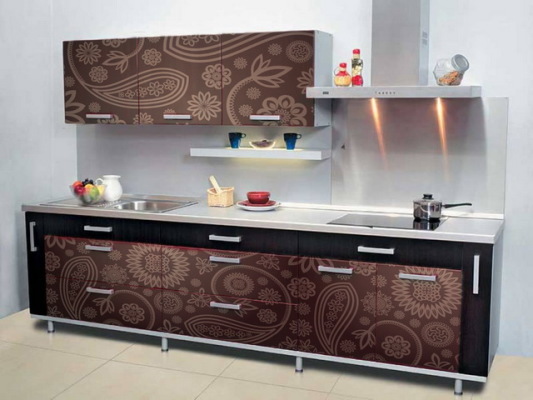
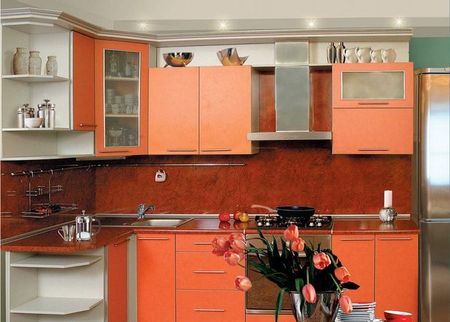
- to make the kitchen set look like new, it can also be pasted over with vinyl material. For this room, the characteristics of the strength of raw materials and the ability to constantly withstand mechanical stress are very important. Gloss will look good here, but remember that the surface requires careful maintenance. Many designers recommend the use of self-adhesive compositions with photo prints and bright images. The drawing of citrus fruits will have to be in place for the kitchen;
- you can also update the furniture in the bathroom or toilet with the help of this raw material. Due to the properties of not absorbing moisture, the glued surface will not only look beautiful, but also have practicality. For the facades of cabinets and cabinets in the bathroom, use options that are consonant with colors facing tiles of the floor and walls;
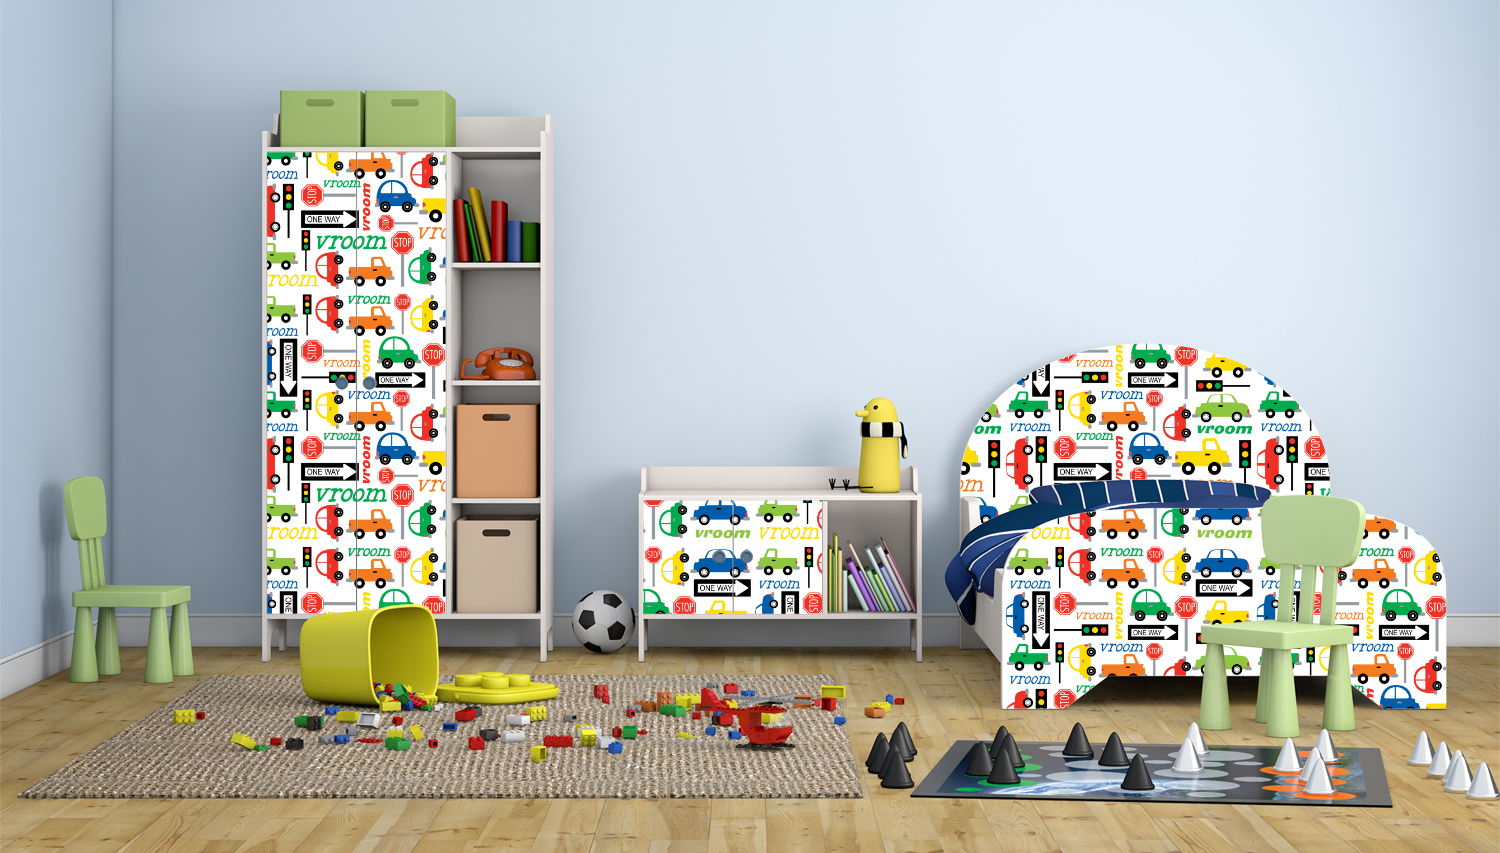
- To freshen up a child's room, glue material with the image of your favorite cartoon characters. Children are always happy with the new, and such a surprise will delight them. The range of films fairy tale characters help the child to make right choice. Raw materials are processed wardrobes, bedside tables and even tables to perform homework. If the plans do not include a complete replacement of the appearance of the furniture, you can stop at the use of individual patterns for decoration.
To update the outside of glass cabinets and showcases, treat the furniture with a transparent self-adhesive film. Such material often has a small applied pattern that will help diversify glass facades.
When choosing a material, think carefully about the future design. Some varieties of holographic or glossy film can have the opposite effect and create a cluttered feeling in the room.
Application technology
Before sticking a self-adhesive film on furniture, it is necessary to prepare tools for work. These include:
- scissors and a sharp utility or construction knife
- soft fabric to smooth wrinkles;
- roller to remove air from the material;
- solvent;
- primer mixture;
- medium dispersion sanding paper.
In the process of pasting furniture with a film, it is first necessary to prepare the surface of the products by treating them with a special compound. For this, a primer is used, which improves the adhesion of the two planes.
The preparation goes like this:
- tighten all hinges and fasteners of the furniture product. Also check that all self-tapping screws are screwed in to the end, if this is not done, small protrusions will be visible on the glued surface, which will significantly affect the aesthetic appearance;
- Examine furniture for cracks and chips. If there are any, they must be removed with putty. Gently apply the mixture to the defect areas and fill in the voids. After drying, treat the places with sandpaper - this will give greater adhesion to the glued surface;
- the next step will be the degreasing of the plane. Before gluing the film on the furniture, soak the cloth in the solvent and go through all the corners and hard-to-reach areas of the furniture board, which will be processed with the material.

When the surface preparation is completed, we proceed directly to the gluing process itself. To avoid shortcomings, follow the proposed algorithm of actions, which can also be found on the video in the article:
- make the necessary measurements of the furniture in order to cut the necessary pieces of material;
- using scissors, cut off from the roll exactly as much as is necessary for pasting the surface;
- before gluing the furniture panel, release the material by 10 cm from the protective layer so that the adhesive base is exposed;
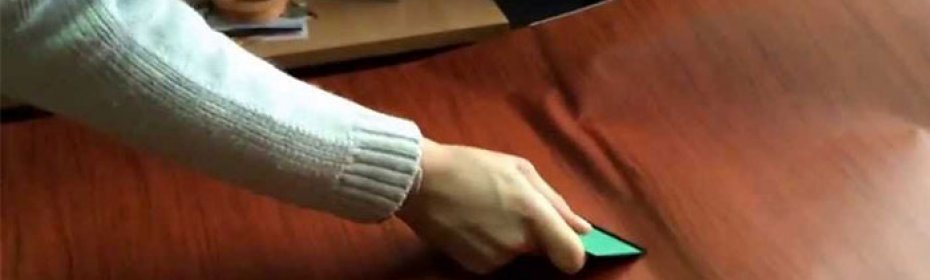
- attach a piece of raw material to the furniture with an adhesive layer and gradually, smoothing the film with a roller, detach the remaining material from the protection;
- it is necessary to smooth the plane from the edge that is already glued to the area that you are going to glue. Thus, it will be possible to avoid the formation of folds and wrinkles on the pasted surface.
There is another method for treating furniture with a film, which is based on the use of a wet solution of water and soap. Here it is not difficult to stick raw materials correctly. In this case, the protective layer is completely removed, the material is placed on the floor, face down. The solution is applied to the adhesive layer using a sprayer, after which a film is applied to the surface. It is appropriate to stick the material in this way if there is large areas finishing, when it is difficult to achieve a perfectly smooth surface.
We take measurements
Cut off the film

Apply it to furniture
Smoothing out
Common mistakes
Sometimes, even after finishing the furniture, bubbles, folds and other flaws that were made during the work may appear. Correcting defects is not a real action in most cases, so the film must be removed and the procedure will have to be repeated again. Doing the work yourself, you can make the following mistakes:
- before gluing the material to the surface, it was not treated with a cloth or brush. Important point removal of dirt and dust causes a smooth coating, and the presence of small particles of dirt underneath will spoil the appearance;
- the cut piece was not enough for pasting the shield. This happens if you do not take a few centimeters in stock when cutting. Usually 2-3 cm are calculated on it, which can be easily measured by reverse side material where the measuring grid is located;
- the drawing on the plane does not match. Answering the question: how to properly glue a film that imitates natural materials, it is worth emphasizing that it must be cut at the seams - then there will be no problems with the displacement of the pattern;
- furniture defects are visible under the coating. The reason for this error is poor-quality preparation of the base or the use of too thin material. If the furniture is old enough, then it is better to use rolls with a thicker front layer. Before gluing the self-adhesive film on the furniture, all damage must be removed.
To do the job efficiently and independently paste over the furniture without flaws, follow the material application technology. It is better to pre-twist all fittings, and process the elements of collapsible structures separately. Properly done work will please all family members with a beautiful updated look of furniture products.

Video
The video shows how to properly glue the self-adhesive film.
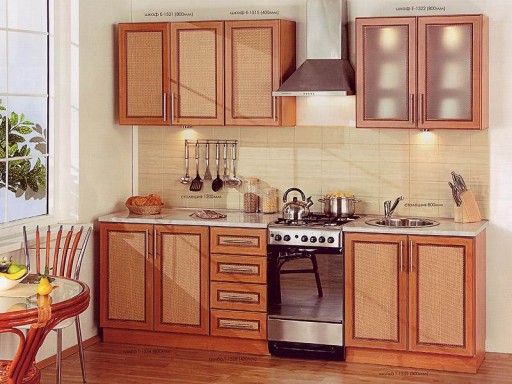
How to update a kitchen set
It's time to freshen up the environment in the kitchen, but buying a new kitchen 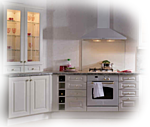 furniture is not yet provided for by the family budget? How to update a kitchen set at minimal cost? Professional designers and decorators in such cases are advised to replace the old countertop and facades with new ones, repaint the "familiar" facades in a different color or paste them with self-adhesive film, and also update the fittings. The most interesting thing is that you can do a light facelift of old kitchen furniture with your own hands using simple tools at hand.
How to update a kitchen set at minimal cost?
How to update a kitchen set: self-adhesive film
The easiest way to transform old kitchen furniture is to cover it with self-adhesive film. Cheap and cheerful! By choosing a high-quality film imitating wood, marble, tile, natural leather or stone, you can give your kitchen, if not exclusive, then a very worthy appearance. Waterproofness of vinyl film, its resistance to high temperatures and mechanical influences will preserve the original beauty of your design impulse for a long time. If you know how to handle a centimeter and scissors, you should not have any particular difficulties with a film facelift. The main thing you need is accuracy and patience.
Necessary materials:
adhesive tape
centimeter
ruler
sharp scissors
stationery knife
plastic scraper for smoothing

The easiest way to transform old kitchen furniture is to paste over it with self-adhesive film.
Step-by-step instruction:
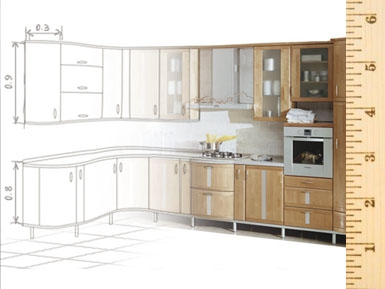
Step 1: We make measurements of kitchen cabinets: facades, sidewalls, drawers. For better and more convenient work, it is advisable to remove the facades and lay them on a flat surface.
Step 2: We remove the handles and other accessories. With a damp sponge, carefully wash all cabinets and drawers, paying special attention to removing grease stains. There should be no traces of grease, dust and other contaminants on the surfaces to be glued. It should be perfectly even, clean, dry and smooth. Otherwise, during operation in problem areas, the film will begin to bubble and move away from the surface. After wet cleaning, be sure to wipe all cabinets dry.
Step 3: A centimeter grid is applied on the protective paper layer on the back of the self-adhesive, which greatly facilitates the cutting and cutting of the film. We note the required dimensions of each part. If all measurements are taken accurately, it is still desirable to leave a margin of 1-2 cm. In places where there will be bends, add 2 cm. If you have chosen a film with a repeating pattern, follow the front side so that the rapports of the pattern match.
Step 4: We cut with a clerical knife along the ruler. We cut out curvilinear patterns with sharp scissors according to preliminary marking with a marker or pencil.
Kitchen set covered with self-adhesive film
Step 5: Having peeled off a couple of centimeters of protective paper, apply the film to the facade with the adhesive side. Smooth the glued area with a plastic scraper to remove air bubbles and other irregularities from under the film. We glue the film not at once with the whole layer, but gradually removing the protective paper by 5-10 centimeters and carefully smoothing each passed section with a scraper. Take your time! Any bumps and irregularities will be especially striking on a plain surface, but on a colorful ornament they are less noticeable. We smooth the film from the center to the edges. Small air bubbles under the film can be pierced with a thin sewing needle, and large ones are cut with a sharp knife and smooth the film.
If the film is uneven during gluing, do not panic! It's not the end of the world yet. The matter is fixable! The self-adhesive film will take a few hours to fully adhere, so you have plenty of time to remove the film from the failed area and apply it again.
Step 6: We perform similar operations with all other facades of the kitchen set, as well as shelves and drawers. For a complete transformation, as a final touch, we change furniture fittings, in particular handles, but new ones and return the facades to their places.
If you just need to add a couple of bright accents, refresh the interior with new colors and nuances, it is enough to use interior vinyl stickers. They can be applied to any furniture with smooth facades, they are made of durable material, so they perfectly tolerate wet cleaning and do not require careful maintenance.
![]()
The most radical way to update a kitchen set is to replace old facades with new ones.
How to update old kitchen furniture: replacing facades
Need a radical budget overhaul? Replace old facades with new ones! This is not only the most radical, but also the most expensive way to update old kitchen furniture, but it will still cost much less than buying a new kitchen set. If you have a modular kitchen or a model that is still popular, it will not be difficult to purchase ready-made facades. For exclusive and out-of-fashion models of kitchen sets, facades will have to be made to order, since there are plenty of companies providing such services today. When ordering a facade, you can choose not only an original design for your kitchen, but also the best material in terms of "price-quality". Economy options: inexpensive wood (usually pine), chipboard, plastic. A more solid new thing: facades made of MDF and solid wood.
For exclusive and out-of-fashion models of kitchen sets, it will be necessary to produce facades on an individual order.
Installation of new kitchen facades can be entrusted to specialists who will certainly be found in the same company that was engaged in their manufacture, or you can install them yourself. To do this, remove the old doors by unscrewing the screws and fixing hinges. Finished drawer doors and fronts are usually sold unfinished in stores, so you'll need to finish them off with a standard 35mm hole drill. Having drilled new holes for the hinges, we fasten the doors to the walls with screws. Ready! Modern furniture is assembled quickly and easily. Anyone who has ever had to deal with home repairs will successfully cope with the installation of new facades.
How to update the facades of a kitchen set: molding and painting
great way quick and easy redesign of old kitchen furniture - 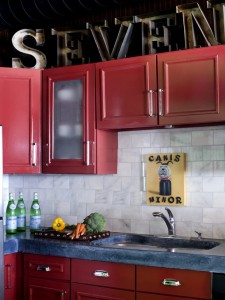 use molding and painting. What is molding? These are decorative overlays that are widely used for finishing various surfaces and structures, such as walls and ceilings. Take a look around! Surely all sorts of moldings are present in your interior. To decorate the facades of the kitchen set, we need thin semicircular planks.
Necessary materials:
glue for wood
decorative semicircular molding
Miter saw
spray gun HVLP
glossy deck paint
drill
furniture fittings
screwdriver
marker
Renovation of the facades of the old kitchen furniture with
molding and painting
Step-by-step instruction:
Step 1: Facade preparation. Before removing the facades, we make appropriate digital marks on each door and cabinet so that we don’t confuse anything during installation and return everything to its place. We dismantle facades, remove fittings and fasteners. Carefully remove all dirt with a damp cloth. We dry the facades with a dry cloth. Since we will use paintwork materials, it is advisable to carry out work not indoors, but outdoors in a well-ventilated covered place, for example, under a canopy. We cover the working surface with a film and lay the prepared facades on it.
Step 2: Installation of decorative molding. Using a miter saw, we cut the decorative molding into segments of the desired length. We cut the outer edges at an angle of 45 degrees. We glue the finished planks to the facade, “planting” them on wood glue.
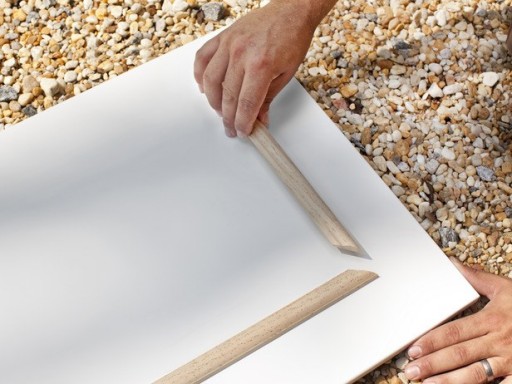
Step 2: Installation of decorative molding
Step 3: With a marker, we outline the places for installing fittings and fasteners. We drill holes with a drill or puncher.
Step 4: Surface primer. We fill the paint tank in the spray gun with a primer. We apply the primer from a distance of 15-20 cm. We wait about an hour until it dries completely.
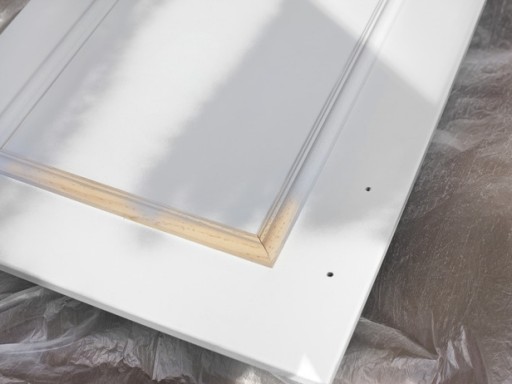
Step 4: Surface primer
Step 5: Painting. When the primer is completely dry, fill the spray gun with deck paint. We carry out painting in the same way as a primer at a distance of 15-20 cm. To create an original pattern or ornament on the surface, you can use special stencils. If, after the final coat of paint has dried, bumps and other flaws are noticeable on the surface, we apply another coat of paint for a flawless result.
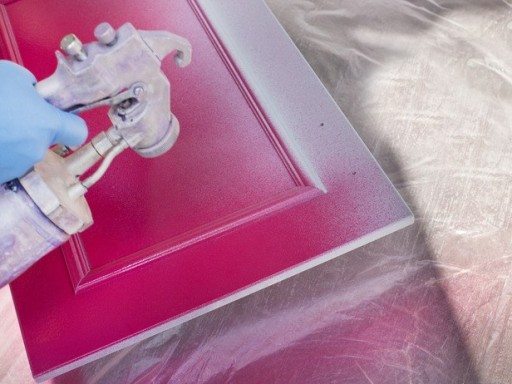
Step 5: Painting
Step 6: Installation of facades. Not a trace of the old facades remains! Guess what to put where. It's good that we took care of this in advance. Focusing on digital designations on facades and cabinets, we return each door to its original place, using screws and a screwdriver. We install new fittings and admire the creation of our own hands!
How to update an old kitchen set with your own hands: decorative inserts
After a kitchen renovation, your old kitchen set does not fit into the new environment? No problem! The matter is fixable! To update the design of old kitchen furniture, decorative inserts made of wallpaper, self-adhesive film, ceramic tiles or rattan, echoing the interior of the kitchen, will help.
How to update an old kitchen set with your own hands: decorative ceramic tile inserts
We decorate kitchen furniture with ceramic tiles
How to facelift an old kitchen cabinet with ceramic tiles? Easy peasy! We remove the doors of the kitchen cabinet from the hinges, thoroughly clean the surface, if desired, paint it in a suitable color. Using tile adhesive, glue the tiles to the facade. To make everything look as neat and beautiful as possible, we create a frame of decorative molding around the “tiled application”. Everything and business!
![]()
To make everything look as neat and beautiful as possible, around the “tiled application” we create a frame of decorative molding
We decorate the facades of the old kitchen with rattan inserts
Necessary materials:
rattan fabric
sharp scissors
decorative wooden planks
furniture stapler
acrylic lacquer
small furniture studs without caps
sandpaper
a hammer
brush
Kitchen facades decorated with rattan inserts
Step-by-step instruction:
Step 1: We measure the front of the doors in order to calculate how many meters of rattan fabric we need to purchase for finishing. The canvas can be bought in the form of finished rolls or cut, which will be much cheaper.
Step 2: We put a roll of rattan cloth in the bath and carefully wet it with cool water. Leave for about half an hour so that the material is well saturated with moisture. When wet, the rattan increases slightly in size. After installation and complete drying, the canvas is stretched like a string.
Step 3: While the rattan “reaches the required condition”, we prepare the wooden planks that we will need in order to press and attach the rattan fabric to the facades along the perimeter. The color of the frame should be in harmony with the interior of the kitchen and the new finish of the headset.
Step 4: If necessary, the color of the planks can be changed by covering them with an acrylic lacquer of a suitable color. Apply varnish to the planks and dry. To remove roughness, carefully grind the painted workpiece with fine-grained sandpaper. After sanding, apply a layer of varnish again, dry and re-sand. For a perfectly smooth surface, it is necessary to apply 3-4 layers of acrylic varnish.
Step 5: Having taken the rattan fabric out of the bath, we roll it out on an equal surface and cut it according to the measurements taken. The doors can be completely closed with a rattan cloth, but the facades look much more interesting, on which only the middle is decorated with rattan.
Step 6: With sharp scissors, we cut out blanks from the rattan fabric. Using a furniture stapler, we attach them to the kitchen facades. We place the paper clips along the edges, then they will be closed with slats and will be invisible.
Step 7: In order for the frame on the facades to have beautiful neat joints, we place the planks in a miter box and saw down the outer edges at an angle of 45 degrees. Wet the sawn areas with a brush with acrylic varnish.
Step 8: Using furniture studs without caps, we nail the planks to the facades along the edges of the rattan fabric so that they cover the paper clips.
To transform old kitchen furniture,
facades can be decorated
rattan inserts
source
One of the simplest, fastest and not expensive options for transforming and updates old kitchen set is its pasting with a self-adhesive vinyl film. Vinyl film for facades has a number of advantages, thanks to which it will perfectly fit into the interior of the kitchen. These are water resistance, resistance to high temperatures, durability, ease of care and a wide selection of colors and textures. For renovation of kitchen fronts you can use one version of the film, you can combine two or more colors, and you can also cut out various shapes from the film and use them as stickers.
To wrap facades with foil, you will need:
- Vinyl self-adhesive film
- Stationery knife and sharp scissors
- centimeter and ruler
- Pencil
- Solvent
- Plastic scraper or cloth to smooth
- Accuracy and patience
Training
Before buying a film, you need to make accurate measurements of the facades, taking into account the sidewalls and calculate the area of \u200b\u200bthe required vinyl self-adhesive. The kitchen cabinets themselves can not be wrap with foil, only facades. It is better to purchase a self-adhesive film of a higher class and with a margin.
For more convenient and high-quality work, it is advisable to remove the kitchen facades and lay them on a flat surface. But before that, number the doors and cabinets to be removed so that nothing is confused during subsequent installation. You also need to remove the handles and other fittings, the handles can be replaced with new ones if desired.
Then thoroughly clean and rinse the surface of the facades with warm water and soap or soda. The surface must be even, clean and dry, otherwise the film may begin to bubble and move away from the surface during operation. After wet cleaning, the facade must be wiped dry and degreased with a solvent.
Cutting films
On the reverse side of the self-adhesive film, a special centimeter grid is applied, which will greatly facilitate the cutting and cutting of parts. We mark the dimensions of each part on the back of the material, while leaving a margin of one to two centimeters. At the fold, add two centimeters. If the pattern of the film is repeated, make sure that the patterns match on the front side.
Cutting the film is carried out along the ruler with the help of a clerical knife. Curvilinear parts are cut with sharp scissors according to preliminary marking.
Pasting of facades
Having peeled off a few centimeters of the paper backing, we apply the film to the facade with the adhesive side. To remove air bubbles and irregularities from under the glued film, smooth the surface with a soft cloth or plastic scraper. The film must be glued not all at once, but gradually, removing the protective paper by ten centimeters and carefully smoothing each section. Then you need to smooth the film from the center to the edges. Small bubbles can be pierced with a thin needle and smoothed out.
On a single-color film, bumps and bumps are more noticeable than on a film with a colorful pattern or ornament.
The self-adhesive film does not fully cure until after a few hours, so if wrapping film lay down on facade not exactly, you can safely peel it off and stick it again.
renovation of facades
pasted over self-adhesive foil facades looks attractive and easy to clean. Thus it is possible renew facades and kitchen set generally.