
How to build a wooden toilet for a summer residence with your own hands: drawings
One of the first to be erected in the country is a toilet, because the need for this building arises within a few hours after arriving at a suburban area. Despite the simplicity and obviousness of the device, you need to follow certain rules when building it.
By the way, a toilet box can be purchased ready-made, since there is an excess of them on the construction market. But it is much more pleasant and interesting to make this design on your own, while approaching the matter creatively.
Location selection
There are building rules and regulations that must be followed in the construction of any building, not just a toilet.
You also need to remember about the interests of neighbors, quarrels with which are not included in anyone's plans.
For the best choice of a place to build a pit latrine, the following recommendations must be observed:
- The toilet should not be located within a radius of 25 meters from the well both their own and those of their neighbours. This will guarantee the quality of the water.
- Such structures never erect in the center of the site, for them allocate an area away from the house. This will ensure the comfort of using the toilet, no one will interfere with anyone.
- According to the norms (construction, legal and ethical) the closet must be erected at a distance of at least one meter from the neighbor's fence or the boundary that separates the plots. If boundary norms are not observed, neighbors have the right to demand the demolition of the building through the court.
- When the house is located on an inclined plane, the toilet house must be built at the lowest point. You also need to take into account the wind rose. All this guarantees the absence of smell.
- For subsequent cleaning, make an access road for a sewer truck.

Rules for choosing a place for a future toilet
Construction of a wooden toilet with a cesspool
The most popular option in the construction of a wooden toilet is the option with a cesspool. Time proven, it is reliable and easy to use and maintain.
When the cesspool is ⅔ full, it is cleaned manually or using a special machine. After the construction of a new toilet on the site, the old cesspool is buried and preserved.
Having decided on the choice of a place for construction, they proceed to the selection of a suitable structure. The best dimensions for this building are the following parameters: height - 2.2 m, width - 1 m and depth 1.4 m.
Well, the shape depends on the preferences of the builder. The most popular are the teremok, the hut and the house.
For construction, both materials left over from summer cottage construction and purchased sandwich panels are suitable.
 In the country, a canopy is used for many purposes and tasks. How to build - drawings and a master class with photo and video tips.
If necessary, cut thin branches of trees and bushes using various brush cutters. How to choose a brush cutter - what do you need when buying?
Create a project
Below are several ready-made diagrams and drawings, from which you can choose the right ones and, based on them, make a wooden toilet with your own hands.


When drawing up a sketch, one should not forget about insulation and ventilation.
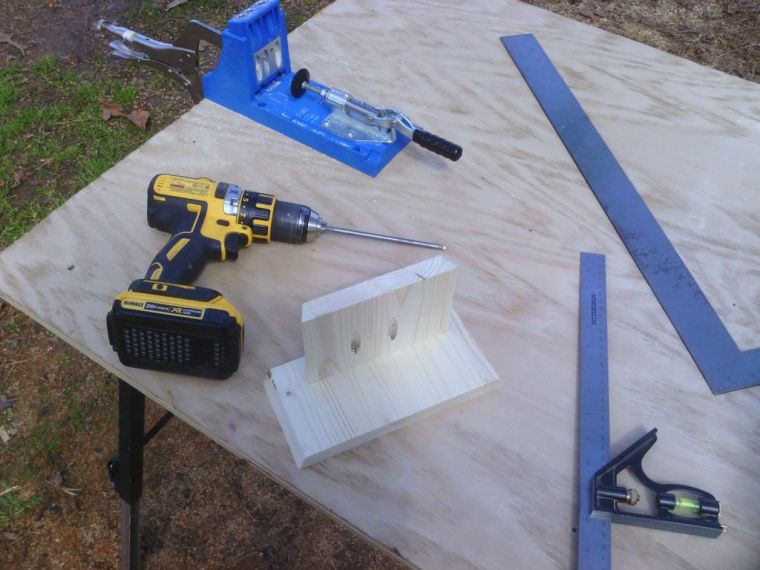
Preparation for construction - materials and tools
To build an outdoor toilet, you need to stock up on the following tools and materials:
- Scrap or pickaxe. And if possible, it is better to rent or buy a more powerful puncher. It is especially needed in hard ground. A crowbar, pickaxe or perforator is needed to break through hard ground (heavy clay, limestone, pebbles, etc.).
- Shovel with a short handle indispensable when digging a small hole in which you can’t really turn around.
- Hand drill.
- Barrel or other suitable container. You can also take a well ring (diameter - 1 m).
To work with power tools, you need to prepare the appropriate extension cords.
We swarm and ennoble the cesspool
Getting started, the first step is to dig a cesspool. The diameter is determined arbitrarily, there are no strict requirements in this regard. The depth of the cesspool directly depends on the groundwater flow, the lower their level, the smaller such a pit will be.

Cesspool with concrete ring
It is necessary to dig in good weather, without rain. It is best to dig a pit to sand, which perfectly absorbs liquid fractions. The pit is cleaned, leveled and rammed.
Next, a barrel or prepared standard well rings are installed there. The life of such a drive will not be long. Therefore, it is preferable to use concrete rings, but special equipment will be needed.
You can also line the pit with stone or brick, reinforced with reinforced mesh or rebar, and then apply a waterproofing layer and plaster.

We are building a frame
After the construction of the drive, the construction of the house begins. To do this, holes are drilled on the preliminary marking, into which columns are dug for support. If the toilet is to be used all year round, the foundation is dug below freezing in the shape of a rectangle.
The frame for the toilet is made of wood, preferably from a pre-cut timber. In addition to sheathing on the outside, it is desirable to strengthen the frame inside with scarves or braces.
At a height of 0.5 m, transverse bars are installed, which will be the basis of the toilet seat.

We knock down the toilet seat
Lags for the flooring of the roof of the toilet are not needed, the design is quite light. The choice of material for her is unlimited. It is only necessary to take into account the design of the entire site, the toilet must be one with it.
But the use of a tile covering, similar to the roofing of a house, will still require strengthening the roof frame.
To the frame you need to nail the bars vertically. You can also board, in steps of 15 cm.

toilet frame
Sheathe walls, roof, floor
To sheathe the walls both outside and inside, you can clapboard or other material that is on the farm.
Then the door is hung and the floor is laid with wooden boards. Or it is poured with concrete, followed by laying tiles.
If possible, electricity is supplied to the toilet house and either a simple light bulb or spotlights are mounted on the ceiling.

Ventilation
The next stage is the construction of ventilation. It is better to do it on the wall behind the toilet and display it at a level above the roof.

To do this, take a PVC sewer pipe, 10 cm in diameter, and attach it with tin clamps to the back wall. Then it is taken out through the hole in the floor into the cesspool to a depth of about 10 cm. The top of the pipe must be brought up through the roof to a distance of at least 20 cm.
The exit to the pit is sealed with tow soaked in a bituminous primer. And at the exit to the roof, a tin apron is installed and cemented, it can also be poured with bitumen. It is recommended to put a deflector on the pipe for better traction.

One of the ways to implement ventilation in the toilet
How to quickly build a wooden toilet in the country - watch the video:
Powder-closet - a toilet without a cesspool
 It is much easier to build a toilet without a cesspool, powder closet, than with one. The waste container is installed directly under the toilet seat and taken out as needed.
The principle of operation of such a toilet is to place a bucket or other suitable container under the toilet seat, and a box with sawdust, peat, dry hay or earth is placed near it.
This backfill is used to powder the bucket after using the toilet, which is why it is called powder closet. Everything is very simple, and this is the principle of all modern dry closets.
To build such a closet, you just need to put a toilet house and place a bucket and a compost box in it. It also needs to be ventilated.
It is possible to mount a pipe in the bucket, which is led out into a hole on the roof (as in a pit latrine).
When using a ready-made dry closet, a box is not needed. Waste is recycled using the latest technology, they only need to be disposed of in time. This is a godsend for modern, constantly busy people.
Tips from experienced gardeners
Many summer residents choose sheet materials for building a toilet. After all, they greatly reduce the time for sheathing. But a wooden house is still much more environmentally friendly and looks more harmonious outside the city.
In addition, there will be no dampness in such a room, the air will be much cleaner. Before using a wooden toilet, it must be coated with a special impregnation for durability.
If the task is to build a reliable and durable structure, preference should be given to brick. Also suitable and corrugated board.
It is fixed on a wooden or metal frame. When using natural stone, you can build a real architectural miracle with high strength characteristics.
As an option, you can build a wooden structure with your own hands, which combines a country shower, toilet and utility block:
A year-round toilet is best insulated with inexpensive and practical foam..
Using all of the above tips, you can safely build a wooden toilet on your site. Its construction will be easy and cheap. And what it will be depends on the inexhaustible imagination of the summer resident, his capabilities and needs.