
Bath pond
It has always been common for owners of summer cottages to approach the arrangement of their square meters with a special imagination. In the yards of the owners of the land plots, you can see the incredible shape of the beds, and fabulous benches, and compositions from old, almost antique things. All this decorates the landscape and uplifts the mood, unless of course done with taste. In this article, we invite you to discuss one such interesting idea - arranging a pond from a bath in the country. The work plan will help to do this efficiently and quickly.
Choosing a place for a country pond
A pond in the country from a bath has a lot of advantages and disadvantages: firstly, it is the size of cast-iron baths - just enough to turn it into a mini-pond; secondly, the strength of the walls - no problems with waterproofing; thirdly, a drain hole - you can lay communications for a waterfall or fountain.
Before proceeding to the main work, let's decide where it is better for us to break a mini-pond. Take a walk around your possessions - there will certainly be a suitable place for such an undertaking.
Our small-sized pond should be in the sun for some time during the day, and for some time in the shade. Any tall tree that will grow somewhere nearby will cope with this task, and for a certain time a shadow will fall from it on the pond (but do not break the pond right under the tree so that the falling leaves do not spoil your idea).
Also pay attention to the relief - the place should not be very low, so that dirty melt and rain water does not get into the pond. The best place will be a flat, drained surface. The ideal soil is clay and sand.
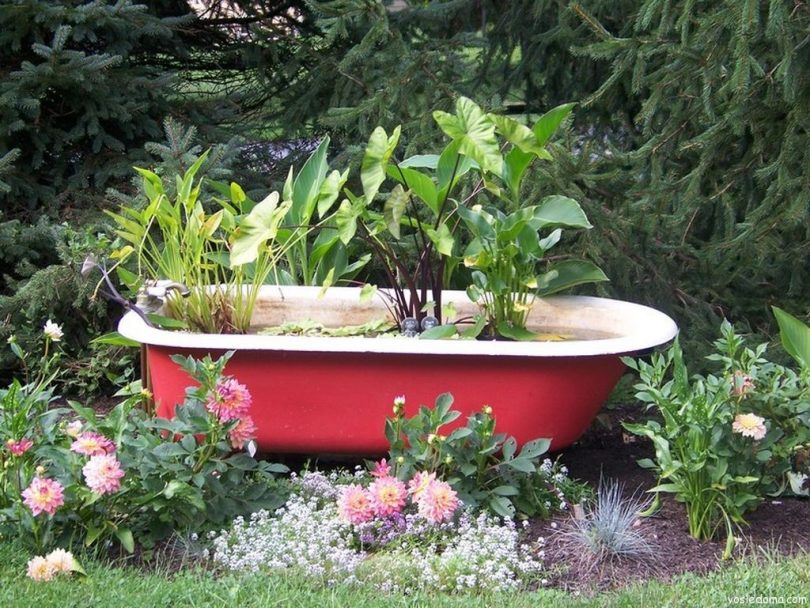
 Second life for old things
 And, of course, have a mini-pond from the bath in sight or next to the relaxation area. What is the point of putting so much effort into making a bath pond with your own hands, and losing sight of it in the dense vegetation of the garden?
Pond from an old bathtub with a deepening
The place has been chosen, now let's get to work. You will need the following tools and materials:
- old cast iron bath
- crushed stone, pebbles, facing stones and bricks;
- cement, sand and clay; wheelbarrow;
- container for mixing the solution;
- Master OK;
- shovel;
- tin sheet;
- waterproof glue;
- roulette;
- level;
- paint or film.
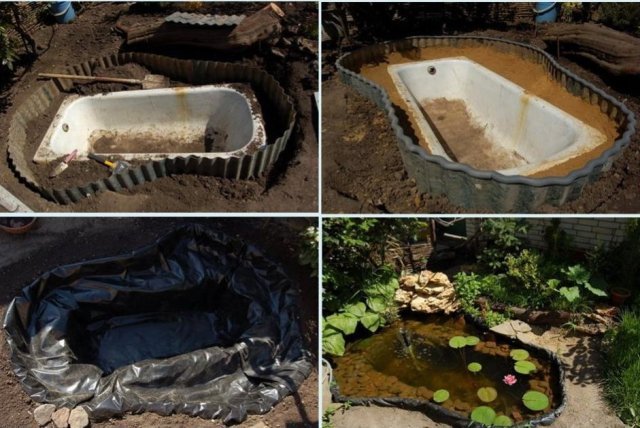
Do-it-yourself arrangement of a reservoir in the country begins with the preparation of the most important participant in the program - with a bath. Cement the side drain. If desired, the surface of the bathtub can be made more natural in color - paint it in any natural tone with a mixture of tile adhesive and pigment or, if you want to imitate the color of sea water, lay a film of the appropriate color.
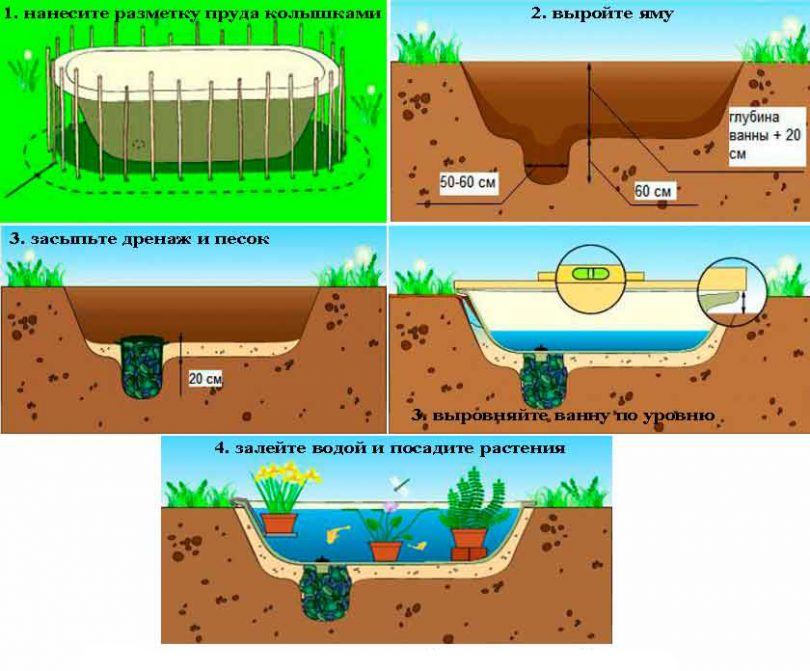 Stages of building a pond from a bath
 Now we are preparing a place for a pit. Make a mark on the ground and dig a hole 25 cm deep deeper than the height of the tub. Dig another hole under where the drain will be. This pit should measure 60x60 cm. Insert a twisted sheet of tin into it so that it is 25 cm higher than the level of the main pit. Fill the small hole with gravel up to the edges of the sheet and remove it after filling the sand cushion. The layer of sand should be 25 cm. It's time to install the bath. When installing, make sure that the place of water drain corresponds to the location of the small pit. Pour wet sand into the void between the walls of the bathtub and the bowl of the pit. At the same time, water can be poured according to the level of sand being poured. The earth will settle, and if you plan to plant plants in your mini-pond, drain the water through the drain hole and prepare everything for the future inhabitants of your reservoir.
Bath pond in practice (video)
Water from the bath on the surface
If you do not have the opportunity or desire to make a mini pond from an old bath with your own hands buried in the ground, then this paragraph of the article will show how to make a pond on the surface of the earth. You will avoid serious earthworks, but you will have to spend money on additional material to ennoble the bath around the perimeter (brick or tile for cladding).
So that over time the mini-pond from the bath does not tilt or loosen, a strong cement foundation of 25 cm is needed, which will need to be allowed to dry well (approximately two weeks). But first, clear the place and make drainage from sand and gravel.
 Pond on the surface
 If the bath will stand on its own legs, then it can be installed on the foundation immediately after drying and tiled as desired. If the bath does not have legs, then it will be held by brickwork.
Tiered Pond
 Fans of non-standard solutions and original forms in landscape design should like the idea of a multi-level pond from a bath
 Just as in the previous version, make markings on the ground around the cast-iron bath. Add about 50 cm on each side, but make the lines uneven: increase or decrease the width to look more natural. Remove a layer of earth 40 cm to the outline of the bath itself. Dig a pit, considering that it should be lower by as much as you removed the land from the first level. Install a bath. Dig in fiberglass slate along the outer contour, put a corrugated sleeve on it. Pack this area with sand and cement. Now it's time to cover the entire structure with foil and pour water.
A step-by-step guide to building a pond from a bath (video)
Decor
That's for sure, where you can turn around and give space and free rein to your ideas, so this is when designing an impromptu reservoir.
stones
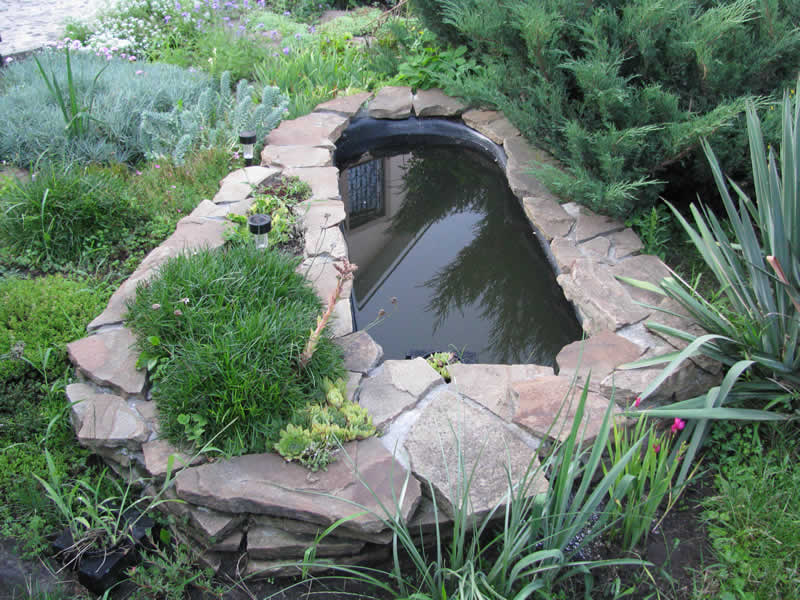
To make your ordinary old cast-iron bath look like a natural pond, it can be lined with stones from the inside. To do this, use waterproof glue and rounded stones. Start work from the bottom and move to the sides. The gaps between the stones can be decorated with sand, sprinkling it on glue. Leave enough space between the stones if you want to put plants in pots.
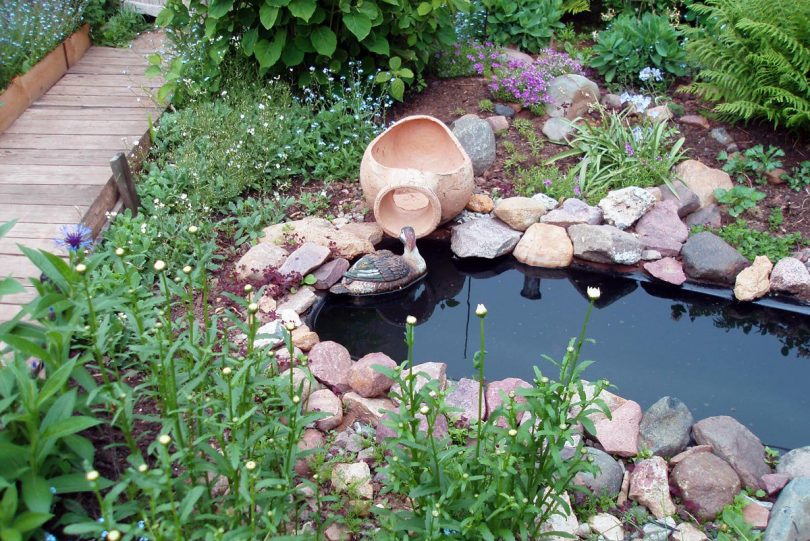 Shape the contours of the bath with stones of different shapes and sizes for the natural relief of the banks and in order to brighten up the regular geometric lines of the bath
 Flora
You can decorate the reservoir that you made in the country with your own hands, not only with stones, but also with ornamental plants. Pre-draw a sketch, so it will be easier to complete the planned work. Plant plants both around the pond and in the pond itself. In order to decorate the place around the water, plant coastal varieties of perennials, after filling it with fertile, loose soil. Among these - bathing suit, buttercup, fern and many others Grow right in the water water lilies, marigold, duckweed. The roots of some plants need to be fixed in a layer of clay at the bottom of the reservoir. If you have the time and desire, then you can independently get hold of the plants you need in the nearest reservoir. Thus, along with the plant, you will introduce the necessary microflora. Plants are a necessary element in order for the pond on your site to look natural and complete. All this will change your old bathtub beyond recognition.
 Plants will add naturalness
 Although, in fairness, it must be said that perennial shrubs around the pond have not aroused admiration for a long time. But life in the pond is another matter. It is definitely beautiful. In order for this to bring you joy, you need to familiarize yourself with certain rules for breeding animals.
Fauna
Snails are unpretentious creatures, but over time they will "eat" the surface of your bath. The fact is that snails are cleaners and sooner or later they will spoil the artificial surface of the pond.
You can put small frogs in the pond (although over time they will find their own way there). They winter in the coastal land of the reservoir and do an excellent job with insects.
Also, the top fish (oatmeal) can take care of the insects. On average, they reach 6 cm and live up to five years. They live on the surface. They keep in flocks. Similar in lifestyle to verkhovok - bleaks (silyavki). They grow slightly larger, but also feed on insects and swim in flocks in the upper layers of the water.
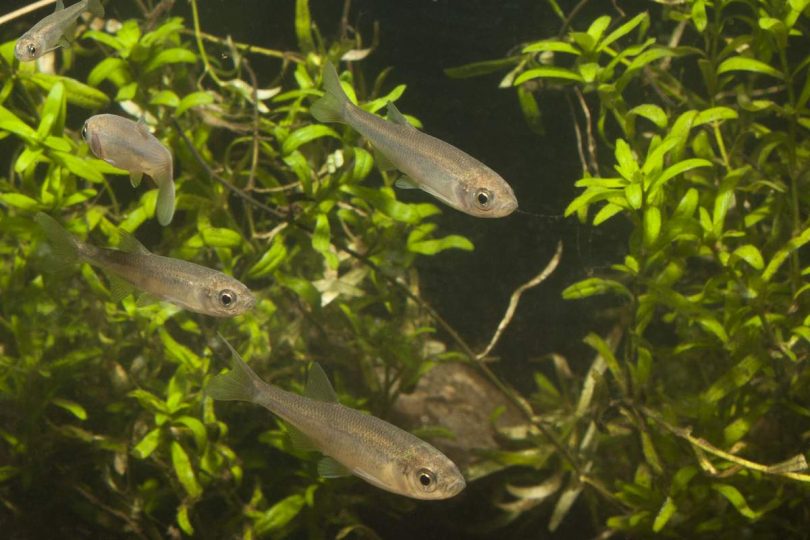 Verkhovka
 Over time, you will notice a characteristic natural plaque on the walls of the reservoir. The water will not be as clear. This is all the work of microorganisms - fish and plants. But don't get upset about it. Thus, the man-made pond will look natural.
Preparing a pond from a bath for winter and other useful tips
The experience of some summer residents shows that fish can survive the winter in a pond if they are covered, for example, with a thick layer of snow (make sure that in a winter with little snow, the snow layer is at least half a meter). Also, the fact that the bath is dug deep enough also saves from freezing. It turns out that the earth warms from below, and from above a layer of ice and snow. But still, as a precaution, place empty plastic bottles in the pond from the bath - they will do the job of homemade dampers so that the bath does not crack if the water freezes too much.
If you dried the bath for the winter, cover it with a sheet of iron to avoid deformation. Rinse the walls of the reservoir, remove the plants.
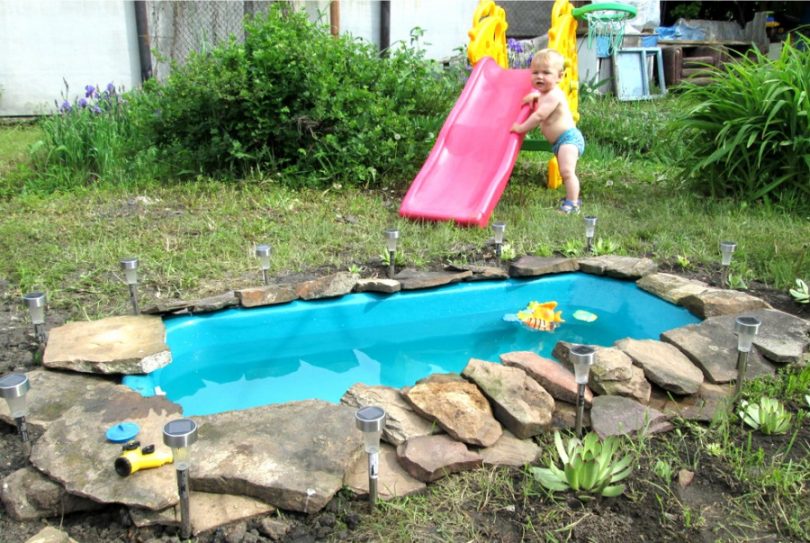 A small pond will delight not only adults, but also kids
 And finally, some helpful tips:
- Do not forget to periodically add water to the pond from the bath. Do not be afraid to pour - the excess will be absorbed into the soil;
- Clean it in case of spread of aggressive plant and fish species;
- To prevent the water from starting to smell bad, add two buckets of water from a natural pond to it. With it, microorganisms will get into your artificial pond, which will feed on algae, which lead to water blooms;
- Think carefully about what kind of fish you will grow in your pond. Not all fish will like to live in an artificial pond (for example, crucian carp love to burrow into the ground, and you simply cannot give them such an opportunity, because the depth of the bath will not allow you to make the necessary depth of the soil embankment).
Experience shows that there are no unnecessary things in a summer cottage. And in skillful hands, even such a bulky structure as a cast-iron bath, which has long been supplanted by modern miniature shower trays, can turn into a cozy corner for relaxing with the whole family. And as you can see, it’s not so difficult to figure out how to make a pond out of a bath. This is a great opportunity to pamper yourself and your loved ones. Quite a bit of money and physical costs will give you a wonderful corner to relax in your yard.